So there I was on a Monday mid-afternoon...feeling bummed about my future...when I get an IM from my buddy Dan requesting a Monday night game. That was enough to pull me out of my funk and gave me something to look forward to. The past five months have been tough for me personally. My sanity is hanging on by a very thin thread. I'm so grateful that Dan Best is around to play ASL and keep me grounded with some normalcy. While the rest of my life spirals out of control...there's ASL to give me something to hang on to.
It was turn to pick the scenario and I selected WO37 The Vital Hours from the latest Winter Offensive Pack. I love the Winter Offensive packs and look forward to them each year. They are a great value and in my experience the WO scenarios are almost always fun.
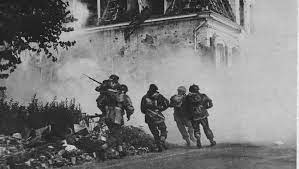
Designed by Chas Argent, the Vital Hours depicts the actions of Sepp Krafft's SS-Panzergrenadier-Ausbildungs und Ersatz-Bataillon 16 as it played a key role in delaying the British 1st Parachute Brigade's approach to Arnhem.
Having landed almost 7 miles from the Arnhem Bridge, the Red Devils had to traverse a large swath of territory, which quickly filled with hastily assembled German Units.
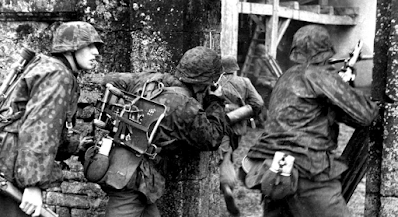
Krafft's combined SS & Luftwaffe troops were stretched thin to cover the Arnhem approaches, but were ultimately successful in delaying the British Paras and disrupting the critical Allied timetables for success at the onset of the battle. Krafft's men would continue to play an effective role under the direction of the 9th SS Panzer Division "Hohenstaufen" for the remainder of the Arnhem fight.
There are a lot of books out there, but this one has a special place in my library.
And of course, A Bridge too Far, both the book and the movie were great resources for learning about the battle. But there are some other resources that are equally worth your time.
As movies go, Theirs is the Glory is one of the great ones. It was filmed on site in 1946. Arnhem was still largely rubbled and destroyed German tanks, notably a King Tiger made up the set for much of the action. It also utilized British veterans of the battle. There are some really memorable scenes and two Panthers and a Tiger are in action in this movie. Only time I can I have seen that in a movie.
The only downside is the lack of Germans. It has a similar feel to Dunkirk...for the visible lack of German soldiers...but trust me...it's a good movie and not another Dunkirk. It should be available on YouTube to watch for free.
And lastly, there is Robert Kershaw's book, It Never Snows in September. Whiting, Beevor and Ryan provide great coverage of Operation Market Garden in their respective books, but the perspective is generally from the Allied Side. Kershaw provides an in-depth accounting from the German perspective and provides some really great photographs as well. My personal favorite among the Arnhem books in my collection.
Dan would be the scenario attacker and command the men of Company A, 3rd Parachute Battalion, 1st Parachute Brigade. This force would consist of 7 x 6-4-8's and a 3-3-8 led by a 9-2 and 8-0 with 2 x LMG's and a PIAT. Entering on Turn 1 would be another 4 x 6-4-8's and a 2-2-8 led by a 9-1 with an MMG, LMG and a PIAT. This force would also have a 75* ARTY towed by a jeep.
As the scenario defender, I would command the men of SS-Panzergrenadier-Ausbildungs und Ersatz-Bataillon 16. My force would consist of 8 x 4-4-7's, a 2-3-7 and a 2-2-8 led by a 9-1, 8-1 and 8-0 with an MMG, 2 x LMG's, a Panzerschreck and a 20L AA Gun. On Turn 3 I would also get a 20L Flak Wagon.
This unit would be led by SS-Sturmbahnfuehrer Josef "Sepp" Krafft. I happened to be at the Quincy Public Library this morning and looked up Krafft's exploits in Anthony Beevor's book on Arnhem.
Beevor relates Krafft's actions upon seeing the British Gliders filling the skies. In short, Krafft felt sick at his stomach and headed into the bushes. Apparently, even combat veterans like Krafft could experience momentary IBS.
Krafft's honesty provides a moment of comic relief.
To win the scenario, the British player must amass 12 or more VP. Controlling buildings adjacent to the road G13-D14-I19-I20 are worth 1 VP and building F14 is worth 2 VP. There are 8 possible points, which then requires that the British also exit at least 4 VP between G20 and K20.
"The British paras must cross the stream, take several building and exit at least four VP. All against trainee German troops. The plan is to eliminate the Germans and assault directly toward the exit. The British have advantage in CC and hopefully cut some rout paths and take some prisoners."
I set up my defense opposite the stream. I feared a north edge Schwerpunkt that might make a run for the exit. So I placed a 4-4-7 and 2-3-7 as well as the 20L AA Gun on the elevated road to hold that flank. My plan was to hold the stream as long as possible and then fall back to the 2 hex stone building and hold that for as long as possible.
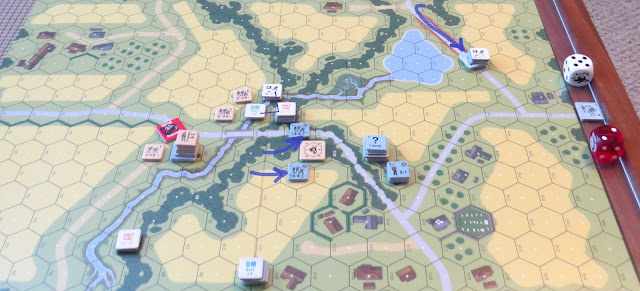
Turn 1 British - Dan's 9-2 kill stack whacks me right off the bat. I would miss nearly every single morale check in this game. It was maddening. I would pin a half-squad...but otherwise I didn't do much.
Now Dan and I are famous for our occasional (meaning semi-often) gaffs. Well Dan would forget to bring on his Turn 1 reinforcements. I also forgot. So it turns out that Dan's jeep towing the 75* ARTY took a tea break with a friendly Dutch woman. So what are ya going to do...these things happen...
Turn 1 - German - I routed back and then successfully Prep-Fired against Dan's boy adjacent to me in the north.
I would also pull back to avoid the 9-2 stack of death.
By the end of Turn 1 - I had basically given up the stream line...which wasn't good. I had hoped for two turns. But I could not stand toe to toe with the 9-2 stack with 22 FP. I also moved my 4-4-7 & 2-3-7 towards the house by the exit zone.
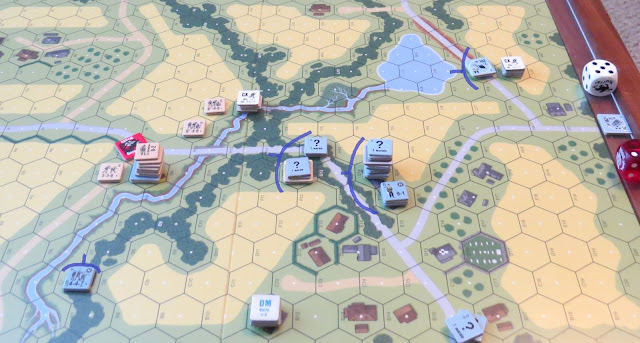
Turn 2 British - Dan's late arriving reinforcements enter the battle. Meanwhile his other units begin to push across the stream.
I think we have covered the fact that Dan is a very aggressive player. Well his Turn 2 movements were very aggressive indeed. The jeep rolled into in my LOS. The gun crew attempted to set up the gun and would be KIA'd. His 9-2 would cross the stream, but other units met resistance along the wooded road and didn't move very far.
"Hey fellas...have a care...there are Germans watching the road." "No worries mate...we got this!!"
At the end of Turn 2 - Dan's penetration across the stream was still contained.
The firefights were generally bruising for us both. I got in some hard licks on Dan's Red Devils, but in return, my boys were breaking with every morale check. I couldn't stop breaking and/or pinning As a result, I had to give up the forested road and fall back to the main stone building. The forested road was of course a huge problem for me. Dan could easily get next to me and take me in close combat. I had placed my final defense in the stone house by the exit zone. So I was ready for a breakthrough.
Turn 3 British - Dan had reentered the jeep and ran it ride down the road towards my 2-3-7 with a Panzerschreck. I fired...hit and wiped out the lot. This was a bucket list item as I had never taken out a jeep with a Panzerschreck. But my boys in the forested road were now pinned and in real trouble as the 9-2 death stack was next door.
Turn 3 German - my Flak Wagon enters and stops. Defending the exit zone was its primary task.
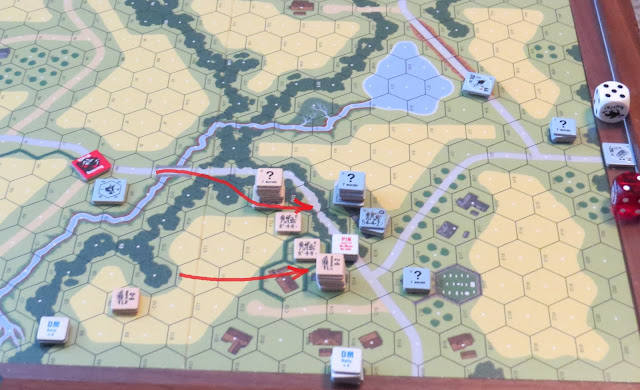
Turn 4 - British - Dan pushes hard into the center of my positions. My broken squads are doomed, but I do manage to do some damage to the assault on the main stone building.
As British 4 ended, he would eliminate my brokies and then move into the ground floor of the main stone building. My 2cm Flak gun on the elevated road had fired all day and done nothing...nothing even a Pin Check. I also didn't get rate of fire with it. I was very disappointed in it.
"Heinrich...I thought you had experience firing this weapon...so far you haven't hit anything....you even missed the building."
Turn 4 - German - I was slowly falling back with one 4-4-7 beside the graveyard. This unit would play a key role the end. A British squad was pinned on the ground level of my main stone building. I decided to send my 8-1 and two squads into CC with it. Meanwhile my 9-1 would stay upstairs with a 4-4-7 and my now MALF'd MMG. This would prove to be an unwise decision.
I would gain ambush and still only casualty reduce the British squad. Now I was locked in MELEE...not a good thing.
Turn 5 British - Dan's boys begin to crowd me and my MMG was now gone as I rolled a 6 on the Repair dr and had chucked it out the window.
I would then make a fatal mistake. My 9-1 went for a Final Protective Fire....and my dice punished me with a BOXCARS...oh good grief. Dan's 9-2 took two squads into the MELEE and would to produce to wipe out my two squads and the 8-1. Just like that my Alamo defense was gone. I was down to 2 and a half squads...no leaders and 2 x 20L guns.
Turn 5 German - Dan would eliminate the crew of my 20L AA gun. My 4-4-7 by the graveyard would be broken but routed to the woods at the exit zone. Despite all of my losses, my boys were in the nearly every possible exit zone hex. I still had a chance to win this thing.
"Just one last Movement Phase Dieter...we just have to hold them off for one more phase."
Turn 6 British - Dan launches his last ditch effort to get the necessary 4 VP off the board through the exit zone. My boys fire everything they have and incredibly manage to Pin the British 9-2 and Pin and/or Break the other British squads. My final line has held and given me the win.
Wow...this scenario was really fun and came down to the wire. Dan very nearly won this battle. His mistake in forgetting to bring on his reinforcements on Turn 1 might have changed the final result, but we can never know for sure. My thanks to Dan for another epic game.
Krafft's men had done their job and stolen vital hours from the British timetable.
"The plan did not work. So much time was consumed eliminating German units there was not enough time to exit. It did not help I forgot to enter my reinforcements on time. Although the fighting for the building was intense and the reinforcements we involved. So, likely the result would be the same. Congrats to Grumble Jones on a hard fought victory. It came down to his final unit firing to break the 9-2 and two squads for the win. Well played by Grumble Jones!"
That's a wrap on a bonus Monday game!











No comments:
Post a Comment