

For our next game, Dan would reach into the scenarios of King and Country once more. This time, we would return to Crete. Crete is a fascinating battle. It's the victory that nearly wasn't for the Third Reich. Up until this point, they had not faced a serious set back on the ground. The air battle for Britain had not gone as planned, but the German romp through the Balkans had added new laurels to the German Blitzkrieg. The plan for Crete was as daring as they come, with a daylight paratroop and glider landing right on top of an entrenched enemy. German reinforcements would come in by sea and air. And like any good ASL scenario...it would all go awry from the first turn.

I've always enjoyed playing scenario set in Crete, but can't say that I've had tremendous success in winning those games. Our most recent Cretan game was Probing Layforce and I was fortunate to win that one. The defenders in the Cretan based scenarios tend to win them.
Our choice for tonight, On Silent Wings (designed by Rick Troha) follows that same logic. ROAR has it with 8 British and 1 German win, while the ASL Archive has it with 5 British and 2 German wins. This will definitely be a tough scenario for the German player. Oh...and that would be me tonight...
Crete has always struck me as the kind of attack the Germans should have mounted on Britain as the evacuation of Dunkirk was going on. It's hard to believe the Germans could not have coordinated a bold and air and sea attack on the vulnerable British forces at that point in time. Of course Crete also showed how heavy the losses might have been for such a daring assault. As we all know, Crete was the graveyard of airborne operations for the Fallschirmjaeger for nearly the remainder of the war. These elite troops would be squandered in bloody battles in Sicily, Italy, Russia and finally in Normandy.


As the attacking Germans, I would command the men of Abteilung Genz, Battalion I, Luflande-Sturm-Regiment 1. My boys would come in on 11 gliders. This force would consist of 11 x 5-4-8's led by a 9-1, 8-1 and 8-0 with an HMG, 3 x LMG's and a 50 MTR.

As the defending British, Dan would command the men of the 234th Heavy Anti-Aircraft Battery, elements of the 1st Welsh Regiment and Ad Hoc elements of Mobile Naval Base Defense Organization and 1st Rangers Regiment. This force would consist of 4 x 2-4-7's, 4 x 2-2-8's, and 6 x 4-5-7's led by a 9-1, 2 x 8-1's, and a 7-0 with 3 x LMG's, an MMG, 2 x 51 MTR's, 3 Bren Gun Carriers and 4 x AA Guns.

A look at the battle space. The British AA guns are on Board 19 and the German gliders must have the initial landing hex on board 19. The British AA guns can take no actions until the British part of Turn 1. To win the Germans must eliminate the AA guns and control building I6 on Board 11. The British get infantry reinforcements on Turn 3 and Bren Gun Carriers on Turn 5. The Germans have no anti-tank capability beyond the British AA guns if they capture those. So, honestly, I am not going into this game with any expectation of winning. We'll just have to see how it plays out.
 And now for Dan's Pre-Game Comments:
"The British must defend their AA battery and the crossroads building on board 11. The easier part is the crossroads building. The guns will set up widely dispersed with the 7-0 and HS in the building and the other HS and LMG in foxholes on board 19. This dispersed set up of the AA battery will make the Germans cross open ground to assault the guns and hopefully some units will be disrupted by the low firepower of the troops or hit by the AA guns. Due to SSR the guns cannot fire during the German landing so a bold landing will have lots of CC. The reinforcement will enter and move into the crossroads building and the woods on board 11. While the reinforcement armor (carriers) tries to keep German movement across board 18 limited and disrupt any assault toward the crossroads. Hopefully the AA guns can keep the Germans occupied long enough for the British to secure the crossroads."


My first wind change DR of the game was snake eyes, which shifted the wind in a favorable direction for my gliders. I would completely stick the landing. Dan would hold his fire until I was on the ground.

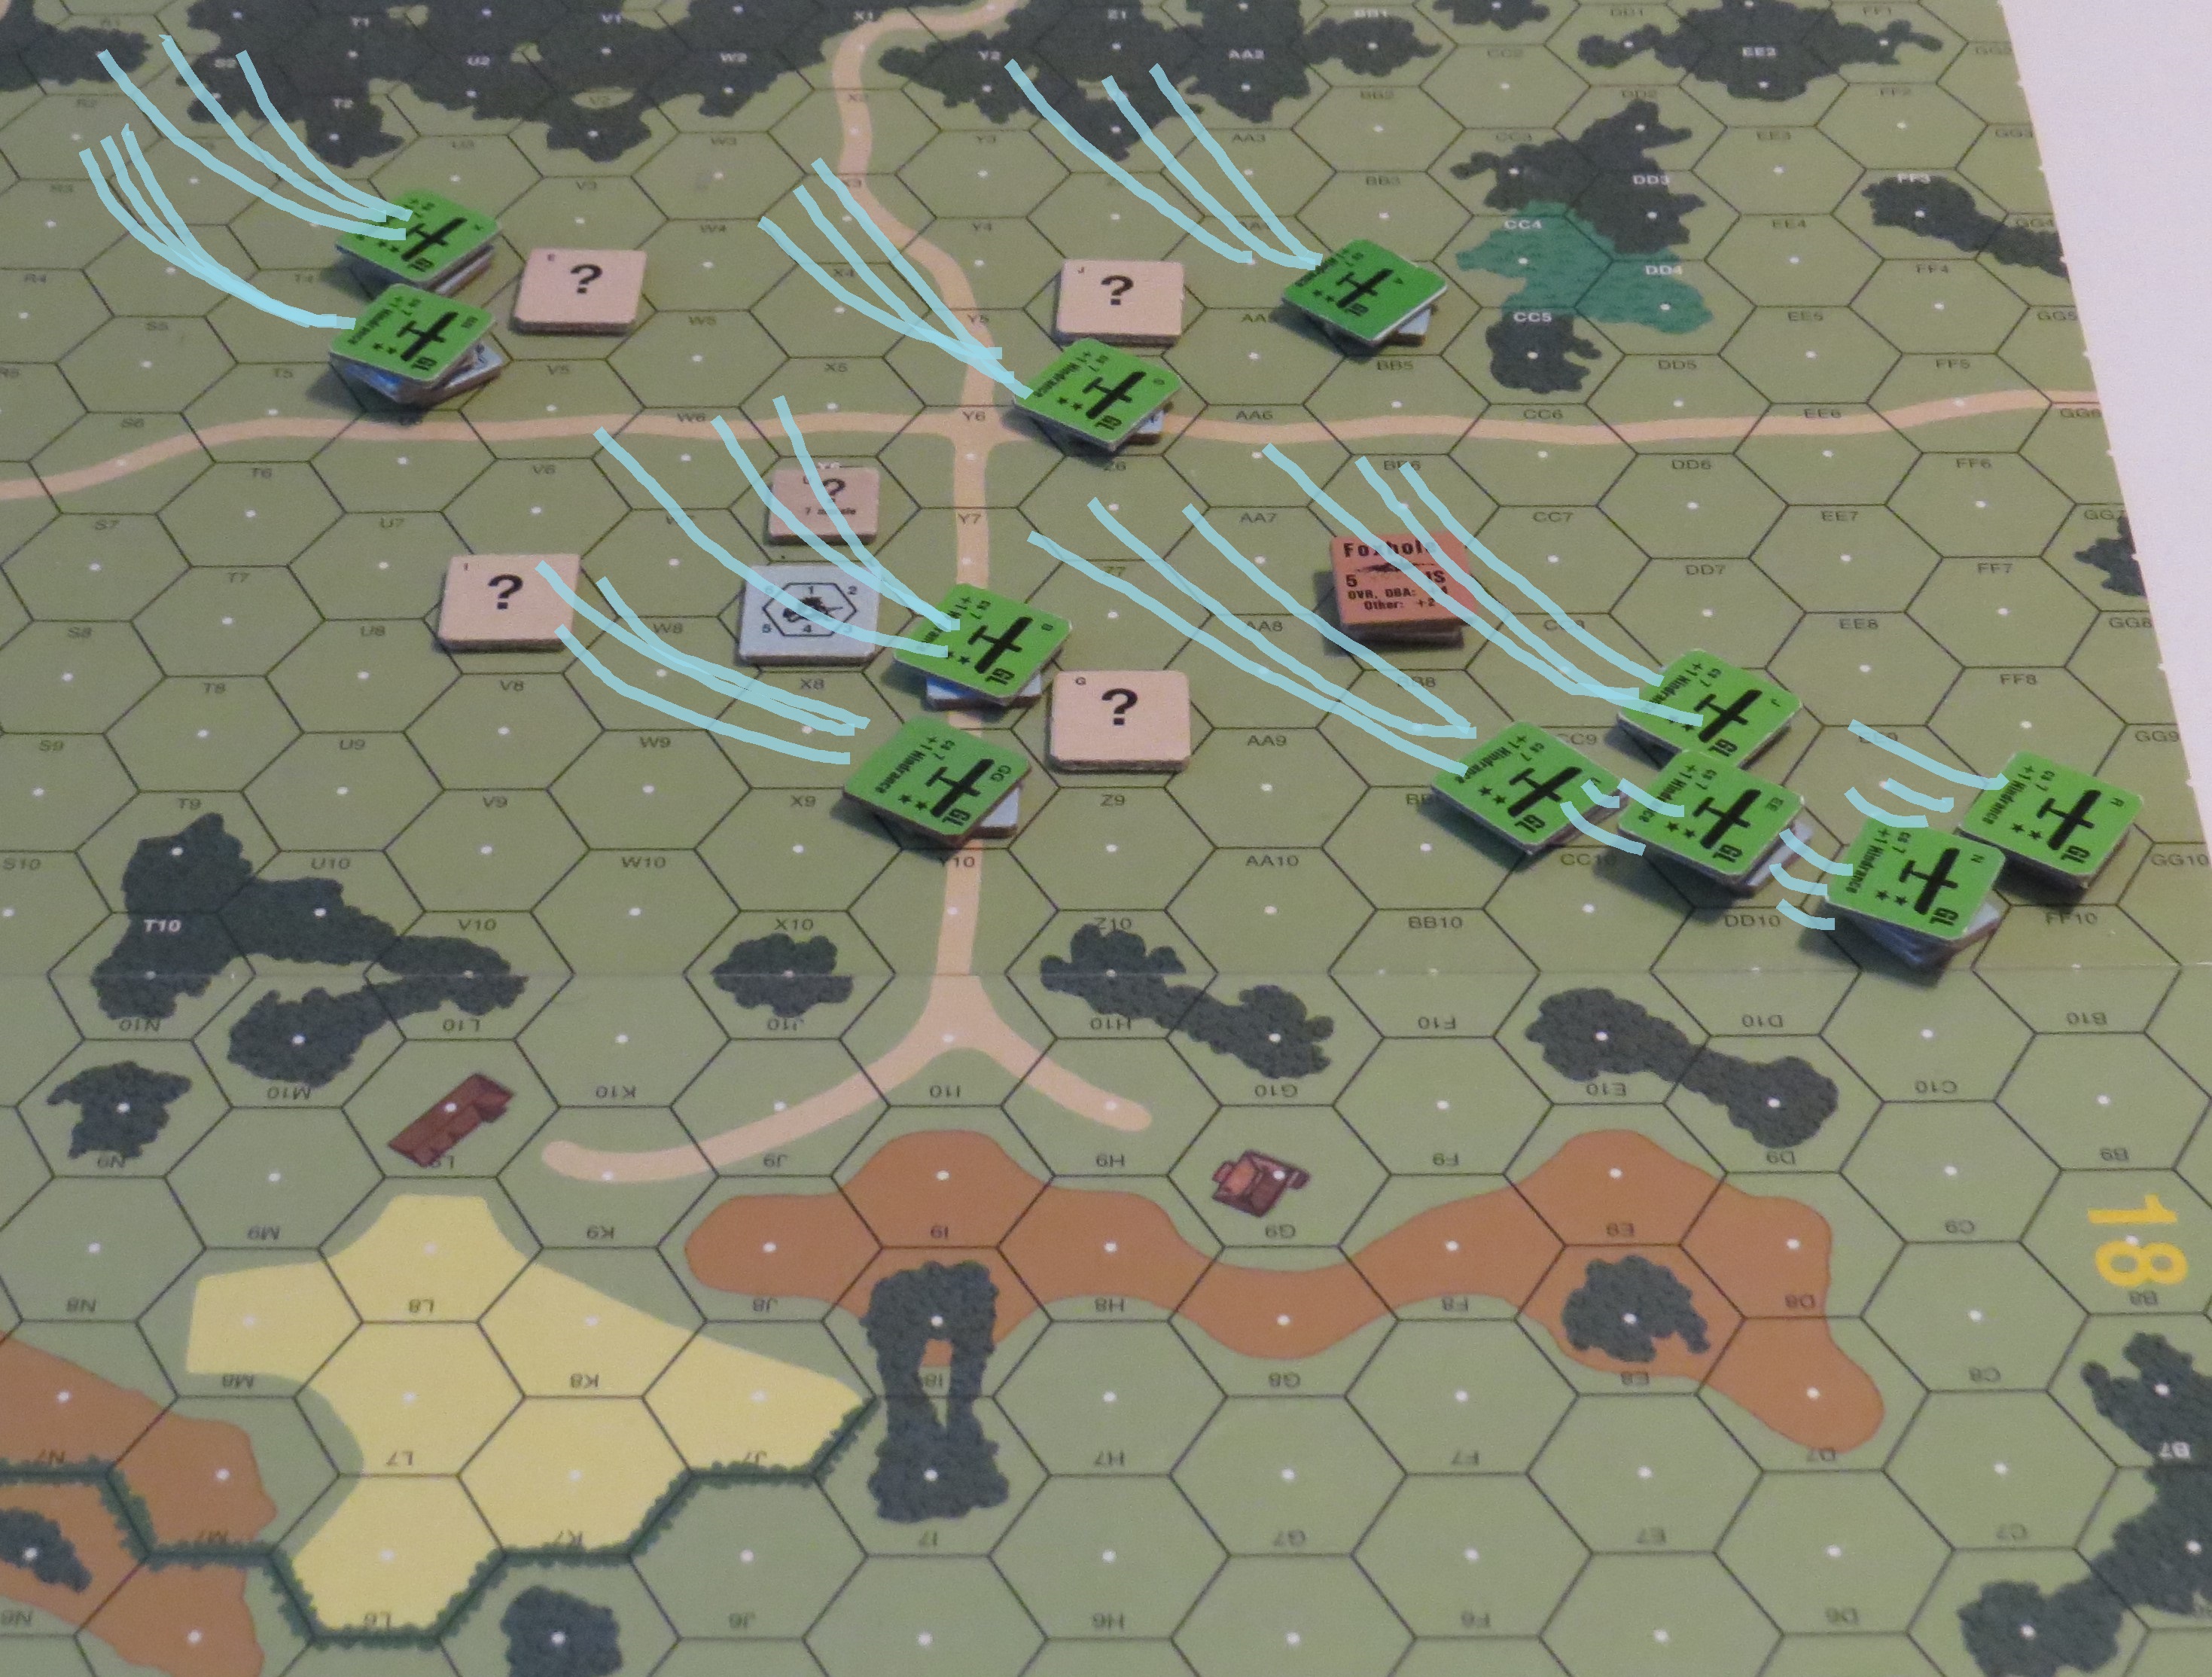
Everyone comes in and hits their initial landing hex. I have never had a perfect landing before. This gave me a lot of hope for a successful game.


Dan's Defensive Fire would damage a glider and wound the 8-1 inside that one. He just got lucky picking that glider. Another glider would be destroyed on the ground and my first 5-4-8 would be KIA'd. My plan was two parts: one element was tasked with destroying the four AA guns and the other element was to make a bee-line for the I6 building location on board 11. Dan's reinforcements were arriving on Turn 3...so I needed to make tracks.


My boys would eliminate two AA gun positions as the turn ended.

We would also get our first prisoners.

Turn 2 - I would go after the house, foxhole and remaining two AA Guns.

A smoke grenade would be helpful in one assault.

As the fight for the guns continued, my 9-1 led the heavy weapons teams to the nearest hill to set up a reception committee for Dan's reinforcements.

Getting the HMG into position on the high ground was critical.

My HMG and Mortar were in position...but I should have kept moving the mortar forward. I stopped it, because I wanted my 9-1 to deploy his squad and free up a full squad to run towards the crossroads house. But this would keep the mortar out of range of the wood line where Dan's reinforcements were likely to set up camp.

My 9-1 would do an outstanding job in this scenario. His paras would execute the battle plan as drawn up. His HMG and mortar teams would be successful in slowing down Dan's reinforcements.
Now for a talk about dice rolls. This would be a strange night for me. I would roll 10 snake eyes and only 3 boxcars tonight. My snakes would come at good moments and give my paras just enough edge to be successful. Dan would roll 3 snake eyes and 7 boxcars. But his last two snakes would be back to back and at the worst possible moment for me as you shall see.

By Turn 3, I had destroyed three AA Guns and was in Melee with the last AA Gun crew. My boys could now focus on attacking the I6 victory building location.

My boys were CX'ing across the board as fast as they could go!

Dan's Turn 3 Reinforcements head into the battle. My HMG would keep them honest.


As expected, Dan's boys had taken up positions at the wood line. My mortar was out of range.


Dan succeeded in getting two squads, an HMG and his 9-1 into the house. I would manage to get my boys onto the hill and begin threatening that location. My 9-1 and HMG had also done it's job and hit the British hard in Turn 4. My mortar had repositioned as well and would soon start dropping rounds onto the British.


Yep...Turn 5 already... the game was so good and intense, that I didn't take pictures during Turn 4. I'm getting old in my old age!!!

Here comes the Cavalry!!!

"Alarm!!! Panzers...wait...no...just little Bren Gun Carriers...cancel the Alarm!!!"

Back at the victory location, Dan would go into Melee with my half-squad beside the building. The other 9-1 would rout away.

My boys were still moving up the hill as well.

Dan would send the Bren Gun Carriers after my HMG, my Mortar and to the I6 victory location.

"For King and Country!!!"

The battle for the I6 building raged on! I kept feeding my paras into the fight, while, my HMG and Mortar peppered the tree line.


I would manage to clear out the I6 victory location, as Dan's carriers moved into positions.

I nearly moved into the open beside the victory location...but Dan cautioned me against pushing it. There was plenty of time, so no need to take unnecessary risks. It was sound advice and so I hunkered down and assault moved into position.

The British infantry had fallen back to the wood line. I was adjacent to the I6 victory location and out of British line of sight.


Turn 7 - I would DM the crews of two carriers, which would be abandoned. I would destroy one in Close Combat and be held in Melee with the other...oh the indignity of being held in Melee by an abandoned carrier. In better news, two of my squads would occupy the I6 Victory Location. Against all odds, I had satisfied the victory conditions. Now I had to hold on to the house.


Turn 8 British Phase. Dan went to his bag of tricks and looked for the best way to take back the battle momentum and get the win. Both of our forces were taxed to their limits. Dan would decide to smoke the I6 Victory location with the Mortar. My biggest fear was that Dan would crit hit it with the mortar. He's done that very thing so many times. And guess what...SNAKE EYES. The smoke was in place. But if you thought I had dodged a bullet you would be mistaken. Dan's second shot (HE) would be a SNAKE EYES...OH C'MON!!! Yep, one squad and the MMG would be vaporized. The other squad was good though.

Of course, after rolling 10 snake eyes myself, I was hardly one to complain.
Dan's last Carrier would then go for a VBM freeze attempt on my 9-1 with the HMG. I managed to break the crew and keep Rate.

It was a valiant attempt!!!

Watching from his hilltop position, my 9-1 would see the British disengage and leave the field.

A final look at the battle. It had been a pretty fun scenario. But it was tough on the British from the start. Lady Luck showered me with good results in this game and we can certainly confirm that 10 snake eyes is tough to overcome in any game.

My boys could rest up and celebrate a great win. Everything came together as planned. That almost never happens. My thanks to Dan for yet another great game in 2020.
 And now for Dan's Post-Game Comments:
"The plan did not work. Mostly due to a good entry by the Germans and quick work by them to take the guns out. The were helped by awesome rolls with lots of snake eyes. But also the assault went well with Germans immediately moving over half the force to attack the crossroads while the rest went into CC with the guns. The Germans only lost two squads taking out the AA guns and the HMG was in position to inflict casualties on the British reinforcements. Well played by Grumble Jones! This scenario is a fun glider attack with lots of movement by both sides. Worth a try for those that want to try gliders. My thanks to Grumble Jones for a great match."

That's a wrap on On Silent Wings!
We'll see you again soon..
No comments:
Post a Comment