Dan Best and I are once again back at another of our 4 game weekends. We are playing a massive amount of ASL this year. I'm currently at 125 games for the year and Dan is at 139 for 2024. We have played 112 games this year against each other. I say it often...that is a lot of ASL. Of course it does have a bit of a price. My weekend's can feel rushed as I to my errands with an eye to the clock to be sure to be home by 5:00 PM game time. My wife is a homeboy much like myself (retired librarian). And we discovered years ago (our 37th wedding anniversary was on the 16th) that maintaining our separate interests and hobbies has been a key to the longevity of our marriage and our friendship. We spent the days doing our things together and then at 5:00, I'm on SKYPE with Dan and my wife is doing her things and talking to folks, etc. When I was out of work three years ago, we got along famously and that was very encouraging that I won't drive her crazy if and when I'm able to retire.

Our first home in St. Louis, MO. My wife has always been supportive of my wargaming hobby. And I'll tell you more so than many of my friends. We had visit from a fraternity brother (each others best man at our respective weddings and in school together in West German) and his wife. They toured the house and saw my wargame table in the basement with miniatures everywhere and my friend of so many years looked at me and "Wow...you're really into this..." He didn't mean in a good way. So, I'm absolutely blessed have my wife in my life.
And good news...I believe Dan's wife is every bit as supportive at their end. In fact, I believe Dan shared the story with me that his wife was a catalyst to get him playing more. She encouraged him to get out and play the game.
You can't underestimate the positive support you receive from your spouse. My wife always wishes me luck and always tells me to "Roll low and Rally well, especially against Dan!!" She's a fan of the 2 Half Squads podcast (or so she lets on).
As an aside, Dan does have more supporters than I do...he is regularly visited by one or more of his cats during our games. It's not unusual to suddenly see a hairy paw show up on the camera feed!!
But those kinds of cats are not quite as worrisome as the Panthers, Tigers, and Lynxes that might show up on the boards!
As it was my turn to pick this week's scenarios, I would select four Grumble Jones scenarios. As readers know, these are not play tested and removing their fleas can be a challenge at times. But Dan has always been not a fan but a huge supporter of my scenario design activities. So, this AAR will cover all four scenarios played Thursday - Sunday.
Thursday = GJ 133 Euphrates Iron Bridge
Friday = GJ139 Kunikov's Schoolhouse
Saturday = GJ119 die Totenkoepf Bruecke
Sunday = GJ121 Before Oldorobo Mountain
GJ 133 Euphrates Iron Bridge would be the first of the four games. It was played on Thursday evening, which is generally the shortest scenario played during the weekend. We would get through all 4-1/2 turns in about 105 minutes. Dan and I play fast, so expect a bit longer based on your own pace of play.
This scenario covers the seizure of a bridge over the Euphrates Rivers in Falluja by the British forces in Iraq. The Axis powers have made some minimal overtures to bring Iraq into the Axis sphere of influence. It lacked the support necessary to stop the British. In this event, the British surprised the Iraqi forces holding the bridge and quickly took control and most of the Iraqis prisoners as they surrendered en masse. So, the scenario takes a bit of creative license to have the Iraqis actually put up a fight. They are saddled with conscripts and a 2 ELR...but as you shall see...that would be no real handicap.
As the defending Iraqi Army, Dan would command troops of the Royal Iraqi Army that had been taken over during the successful coup of the Golden Square members. This short lived coup was sponsored by the Axis Powers, but quickly overcome by the British and their Iraqi Levees. Dan's force would consist of 4 x 3-4-7s, and 4 x 3-3-6's led by an 8-0 and 7-0 with an MMG and LMG.
Salah al-Din al-Sabbagh was an Iraqi Army officer and Arab nationalist that led the Golden Square group which had opposed the government at the time and led a successful coup against the Hashemite Kingdom of Iraq.
As the attacking British, I would command the men of the Iraqi Levies of the Green Howards. My force would consist of 10 x 4-4-7's, led by a 9-1, 8-1 and 7-0 with 3 x LMG's and 2 x Armored Cars.
The battle space.
The British enter on Turn 1 with the Iraqis unconcealed by SSR to replicate the surprise of the British attack. Time in short in this scenario, so the British need to get across the bridge as soon as possible. The British win at game end if there are no good order Iraqis adjacent to a road hex. So, you can't dilly dally as the British.
Turn 1 - I move two kill stack into place to fire at Dan's defenders while everyone else crosses the bridge. My first armored car would make it across and then be destroyed in the Iraqi PREP Fire by the LMG.
By Turn 2, I had taken some prisoners and broken the 7-0 with the LMG. Dan had broken the MMG and I had a half squad in MELEE with the 3-4-7. My other armored car had moved to cover the right flank road. The circles - my 7-0 and 2-1/2 squads were under the knocked out armored car. The other circle was Dan's 7-0 and a 3-4-7...both under DM. Dan would win the MELEE and then rally the 7-0 with snakes and the 3-4-7 with a 3. Dan's dice were once again kicking my @##.

Dan would break my 7-0 and everyone with him. Then his rallied 7-0 would knock out my other armored car with the LMG. Needed a 5 to kill with an LMG...ponder that...it's an element of ASL that I personally truly...I mean truly hate. I don't believe that LMG's should possess the capability to knock out an armored vehicle of any kind. Just my opinion. My prisoner toting half squad would take fire and then be eliminated in CC along with its captives. And that was the moment that I lost the game. I had no one on the other side of the bridge. Going into Turn 3, I would have to start over again with no armored cars. Dan's dice had given him an unlikely rally, which turned the game on its ear.
I had broken many of Dan's boys, but could not exploit from the opposite side of the bridge. And Dan would go on to rally with ease, which it took me a full turn to rally my 7-0 group.
The final turn of the game. I had gotten back across and eliminated the MMG, but it was game over. I did not have the movement necessary to clear the road. Dan's successful rally of the 7-0 and 3-4-7 with the LMG was the game winning moment.
Our impressions of the scenario were favorable. Timing and the OOB's both passed the smell test. I was actually pleased that the hard pressed Iraqis were able to pull off the win. Dan's defense was well placed and his ability to throw me back across the bridge was the key to victory. The British have to press their advantages in men and firepower to throw break down the Iraqis early. Capturing the town square by Turn 2 is essential.
Our second game played on Friday evening was GJ139 Kunikov's Schoolhouse. This is another relatively small scenario that covers the Russians holding a bridgehead near Stanicha during the Ozereyka Bay operations. Kunikov's Naval Infantry were intended as the feint assault, but would manage to establish a bridgehead, which the Russians would ultimately reinforce. Kunikov's defense around a schoolhouse would seal the deal.
As the attacking Germans, Dan would command elements of the 73rd Infantry Division. His force would consist of 12 x 4-6-7's led by a 9-1, 8-1 and 8-0 with an MMG, 3 x LMG's and a STUG.

As the defending Russians, I would command elements of the 305th Naval Infantry Battalion. My force would consist of 2 x 4-5-8's, 6 x 4-4-7's and a 2-2-8 with an MMG, 2 x LMG's, 2 x ATR's and a DC.
The battle space.
Dan wisely set up for a three pronged attack - left - right and center. The grain is mud, so the STUG would stick to the road.
Dan's attack on my left moved into position without hindrance. On the right, my 9-2 got in shot as Dan's 9-1 kill stack entered the board. I would break a squad. The STUG and 8-1 moved unchecked into the center.
My boys had largely just watched Dan's grenadiers move forward. My rolls were running high. So, I would ditch my Chessex dice for my Schwerpunkt pair. The Schwerpunkt dice have a dubious reputation, but after many games of rolling high...I needed a change.
Turn 2 - Dan's attack drives hard into my left flank. On the right, Dan's 9-1 would again be hit hard and would wound as his squads broke. The STUG had smoke up the joint, but my 9-2 was still able to get some hits. I was holding in the center and on the right. The left was being turned though.
On my part of Turn 2, I had broken the Germans on the left and my Commissar and a squad moved forward to keep the Germans broken. The STUG would also MALF its MA. A change in momentum had occurred.
Turn 3 - The Germans again move hard on the right. My boys hit back hard, but the Germans will get into the first victory hex.
A game changing event would happen next. My 4-5-8 upstairs would throw a DC onto the Germans next door. I would roll a 10 and do nothing. Then I would snake eyes for the effect on my 2-2-8 w/MMG and 4-4-7 with an ATR. Yeah...that would be bad. Everyone broke and I would lose my MMG.
Dan would gain entry and destroy my MMG. But, I was upstairs and the breach was also upstairs. So I could quickly shuttle my boys between the two buildings. I had feared the game was lost with my DC fiasco, but Dan's grenadiers were broken around the battlefield and there were no officers available to rally them.
Dan would control the ground level of F6, but was stuck in Melee with me on level 1 of F6. And my boys were now rushing back to the buildings to support Kunikov and hold the schoolhouse.

Dan would commit his squads on the left to the Melee. Another 4-6-7 and LMG would move in the open to get to the schoolhouse and be KIA'd by the 9-2. At this point in the game, Dan's boys on the right were mission killed and everyone on the left was tied up in Melee.
On the final part of Turn 5, my Commissar moved to reclaim the F6 ground floor as the Melee raged upstairs. Kunikov was firmly in control of G7. With that, it was game over and a Russian victory.
Momentum shifts had ultimately favored the Russians in the final turns of the game. The sniper KIA's of the 8-1 and 8-0 deprived the Germans of the ability to rally their broken squads. The 9-1 had been wounded and was not able to move forward to assist. And Dan was unable to win the Melee. Had Dan won the Melee, he could then have gone through the breach to put my boys in CC, which would have made them not good order. Then the Stug could have VBM freezed the 9-2. But there was nothing that Dan could do stop the Commissar from retaking the F6 ground level.
It had been a very fun game. Going into Turn 2, I thought Dan would steamroll me pretty good on the left. But as I stopped the attack on the right, I was able to focus my boys on holding in the center. The STUG's two MA MALF's also saved my bacon. We both concluded that the time limit and the forces were appropriate for the scenario.
Our third scenario played on Saturday was GJ119 Die Totenkopf Bruecke. Set in August 1943, the Russians catch the grenadiers of the Totenkopf Division by surprise during a potential encirclement action after the third battle of Kharkov. Despite being surprised the SS Grenadiers responded with alacrity and managed to destroy a key bridge objective and counter-attack.
As the defending Germans, Dan would command elements of SS Grenadier Regiment 6, 3rd SS Panzer Division. This force would consist of 2 x 8-3-8's, 3 x 6-5-8's and 2 x 3-4-8's led by a 9-2 and 9-1 with an MMG, 2 x Panzerschrecks (early dispersal) 2 x 75L AT Guns, 2 x Pumas, 2 x MKIV's and 3 x Halftracks along with a 9-2 Armor Leader.
As the attacking Russians, I would command elements of the 200th Tank Brigade. My force would consist of 9 x 6-2-8's led by a 9-2, 8-1, and 8-0 with 3 x LMG's, 2 x DC's and 9 x T-34/76 with an 8-1 Armor Leader.
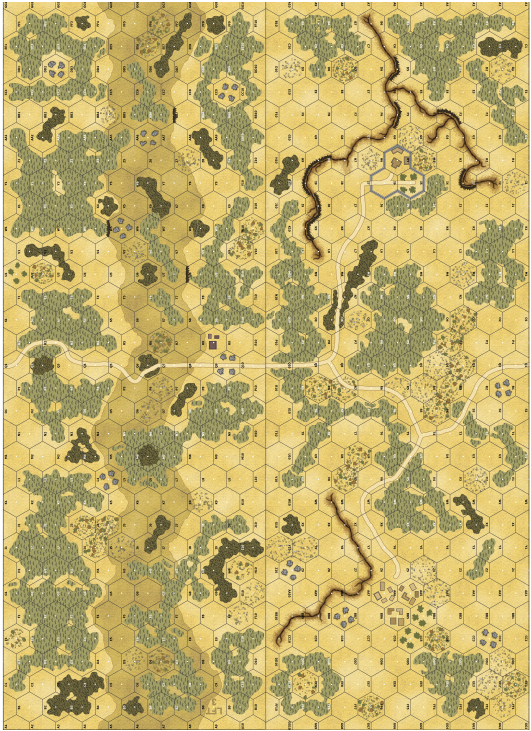
The battle space.

The Russians win the game immediately by removing the bridge demolitions. The Germans win immediately if they successfully blow the bridge with the set DC on or after Turn 5. If neither event occurs, the winner is whoever controls the bridge hex at game end. With all of this in mind, it's critical for the Russians to get to the bridge as soon as possible. The Russians will need as much time to to try and remove the demo charges before Turn.
Turn 1 - my tanks move forward under the eyes of the two German PAK 40's.
First shots would fail to connect.
German Turn 1 and the first T-34 would be destroyed as a burning wreck and a dead 6-2-8. The second would be immobilized and the collateral would take out the second 6-2-8.
The schreck team would make another burning wreck and give me some much needed Russian smoke at my end of the bridge.
As hoped, I was on and across the bridge on Turn 3. Dan's AT Guns were both MALF'd after failed intensive fire attempts. The one on the hill was "6'd" and gone the Repair dr. The schreck team would be broken after every Russian in the joint opened up on them. I would overrun the other AT Gun crew and rout them away from the gun. The German MMG was making it tough to get on the bridge.
I also had some serious MALF problems. Two of my T-34's were out their MA's and four more were knocked out. I was down to three good T-34's and German reinforcements were going to rock my world. Dan's MALF'd guns aside, his dice had been consistently amazing after Turn 1. He was seriously averaging around 5. The 3's and 2's were making life rough for the Russians. I too had my share of 3's, but that would activate Dan's sniper which resulted in the death of my 9-2 and breaking of my DC toting squad. Only my 8-1 was left. Dan's sniper hit me hard and often.
"Dieter, I got the Russian captain!" "Oh yeah you did...I saw his helmet fly off..."
German counter-attack showed up and would absolutely smoke my @##. Dan's hot dice made his Bounding Fire and Advancing Fire Shots look like a clinic on hitting holes in one on the links. The PUMA's would knock out two T-34's and cut off any rout paths for my boys. This was the moment I lost the game for real.
I was in a rough spot with Germans closing in on the bridge from all sides.
Dan's 9-1 would take a squad into CC with my last T-34.
My last two tanks would be knocked out. My crew in the Melee Tank would bail and go into CC with Dan's unbroken 9-1. The 6-5-8 had been broken in my Prep Fire. Dan's 9-1 would snake the CC and clobber my crew. Par for the course for this game.
I had two chances to remove the demo charge on the bridge and failed.
Turn 4 German brought down the Teutonic Hammer on me. I managed to break up the 9-2 group that rushed in adjacent to the bridge, but death was only slowed...he was coming for my boys.
Final picture. Dan's boys cleared the bridge and sent my boys to Valhalla. My last remaining 6-2-8 was locked in Melee with a Puma. That was game and a German win.
Dan was pretty much unbeatable in this game.
Unlike the first two scenarios, this one needed a lot of tweeking. We decided to remove Board 70 and just have the Russians enter on Turn 1. The SSR's would be altered to make the stream flooded and to use the Set DC rules for the bridge and to let the AT Guns have full RoF on Turn 1. Additionally, we removed the Panzerschreck, since it was month too early for those. In place, the Germans will have ATMM capability and the hex adjacent to the bridge would be Street Fighting terrain for the Germans.
All in all a great game and some equally great constructive criticism that will make this scenario much better.
Our fourth and final game played on Sunday was GJ121 Before Oldorobo Mountain. This is my first WWI scenario which relates an action German East Africa in 1916. In this particular scenario, a large force of South African Infantry attack Germans and German Askaris atop Salaita Hill. The South Africans would give a good accounting, but would be repulsed and pushed back.
As the attacking British, I would command the 6th South African Infantry Regiment. My force would consist of 30 x 4-4-7's led by 2 x8-1's, 2 x 8-0s, a 7-0 and 6+1 with 2 x MMG's and 2 x Armored Cars.

As the defending Germans, Dan would command the 15th Feld Kompanie and Abteilung Schultz. My forces would consist of 12 x 3-4-7's, 8 x 4-4-7's, and a 2-2-7 led by 2 x 9-1's and 2 x 8-1's with 5 x MMG's and a 75* ART Gun.
The battle space. The valley is actually a Level 1 Hill.
This final AAR will be short and sweet. The scenario was fun and we both felt it worked well as a WWI scenario. We agreed on some slight changes to improve it as well. The game is a very straight forward. The British are just advancing straight up the hill for some Bunker Hill style action with similar results. Dan's MMG's tore me up with some fairly high losses. In return, I was rolling like I normally do, which resulted in very few impacts to Dan. And his hot dice, which plagued me last week, also plagued me again this week. After the umpteenth 4, I gave the concession. My troops were being blasted hard and I could make my morale checks and wasn't doing anything in return fire. So, I just cashed in my chips and called it a day.
I massed in the center right to advance against the lesser quality Askaris. They had three MMGs, but squads had low range and firepower. I kept my forces with 2 squads to a hex for counter management and to be ready for my one human assault.

Turn 1 British. I would move forward and 25 of my boys would be KIA'd.
One of my Armored Cars would be immobilized. The crew would abandon and them be KIA'd.
I wasn't close enough yet for a successful Human Wave, so spent time shooting up at the Germans forces without much success. On the right flank, I had created a Hero and he would charge up the hill and try to capture an MMG left behind by a broken 3-4-7. In the process of defending his position, he would kill 2 x 3-4-7's and break a third one. But he was the only bright spot in the British effort. He would be KIA'd in a subsequent CC and the Germans would reman the MMG.
I continued to move cautiously into position for my Human Wave assault. I was losing men steadily. And after watching Dan throw low roll after low roll and watching my boys break left and right...I called it a game and gave the concession. Kinda bad on my part, as I was still intact enough to mount a human wave in the next turn...but I was frankly tired of being diced. You never want to begrudge your opponent their good luck...but you also don't have to sit and be victimized. Sometimes. the luck is completely against you. And you have to know when to fold. So I did.
Yeah...you know the feeling...
Sometimes...I don't bounce so well...
Overall, it was a very fun weekend. Dan and I enjoyed all four scenarios and I received some excellent feedback which will make these better.
That's all for now.
Dan and I will be off next week.
But we'll be back for some Halloween action!
We will see you then!


.jfif)


No comments:
Post a Comment