

After a nice Thanksgiving, Dan and I resumed our 2023 campaign with games on Friday, Saturday and Sunday. Our Friday game would be a large one set in Korea. And not only was this scenario huge, but it was also a Night Scenario. I somewhat dislike night scenarios. I truly hate the moving in open within the NVR and remaining concealed. Just kills the vibe for me. Illumination is key...but I usually either don't get it or end up blinding myself. And there's nothing I hate more than being wiped out in Close Combat ambushes. And this game would give me that dissatisfaction in spades.

I'd like the cake...please...

ASL Scenario 214 Seoul Saving would the our selected expedition into death at night for a small force of British Troops. I would be the defending British and do an incredibly poor job of keeping my boys alive. At game end, my entire force (except for the 7-0 and 8-0 who ran off the board edge) would be dead on the field. And all of them would be KIA's in Hand-to-Hand combat with concealed Chinese. Losing ambush in close combat and watching your boys be wiped out with no chance of responding is a bit shattering. ASL is already a very tough game and moments like these take up a notch in on the heartache scale...(let alone the self pity scale).
The historical result was not too dissimilar, except that the British were able to successfully fall back to new positions. In this scenario, the British may only exit begining on Turn 6. It's a 7 Turn Scenario...so this seems a bit late in the game. I would never be able to disengage from contact with the Chinese to move towards safety and it didn't matter as I was wiped out completey by Turn 4.


Historically, the Chinese launched their surprise assault towards Seoul after crossing the shallow Imjin River. An advance platoon of the 1st Battalion, The Gloustershire Regiment would spoil some of the surprise, but I was unable to duplicate that result. My advance platoon would be wiped out from the onset. The British also had battalion Mortar Support. I would draw two Red Cards in a row and never get the much-needed OBA. That's another tired story that plagues ASL. There are of course some fixes to that problem, but suffice to say, Dan and I played it straight by the rule book.
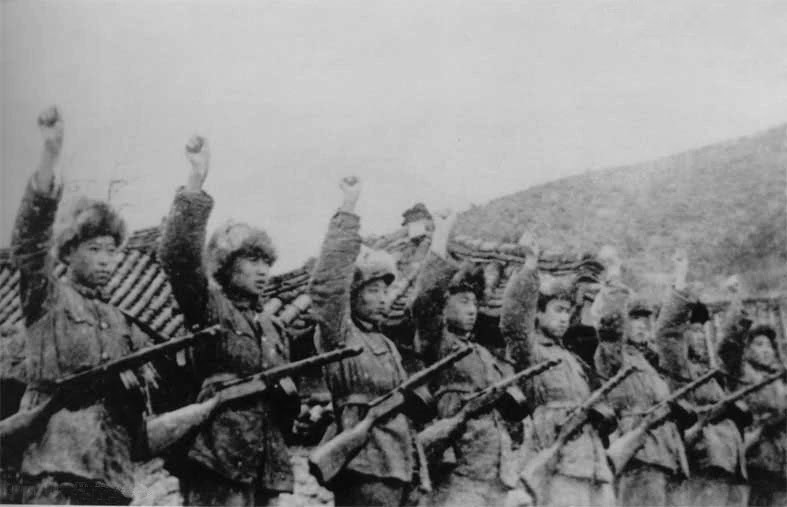
As the attacking Chinese Communists, Dan would command elements of 1st Battalion, 559th Regiment, 187th Division. His force would consist of 26 x 6-2-7's, 9 x 5-2-7's, and 6 x 2-2-8's led by a 9-0, 10-1, 9-1, 8-0 and 2 x 7-0's with 4 x MMG's, 2 x 60 MTR's, 2 x DC's and 12 x LMG's.

It's not every scenario that you have to face 35 squads with only 11 and 1/2 to your name...oh and in the dark. You bet the beast is hungry...ROAR has this one with 5 Chinese to 1 British. Playing the British requires skill and not a little bit of luck. The Brits need to kill as many Chinese squads as possible...which isn't easy since they stripe like Japanese.

As the defending British, I would command elements of D Company, 1st Battalion, The Gloustershire Regiment, 29 Indpendent Infantry Brigade. My force would consist of 6 x 4-5-8's, 4 x 4-5-7's, a 2-4-8, 2 x 2-3-7's and 2 x 2-2-8's led by a 9-1, 8-1, 8-0 and 7-0 with 2 x MMG's, 4 x LMG's, 3 x 51 MTR's, 3 x Wire, 10 x Foxholes, 20 x Tripflares and a Radio with Battalion OBA 80MM MTR.

The British have the advantage of substantial height, but an NVR of 4 renders it largely unusable, especially if you fail to illuminate the battefield. My tripflares would do enough to make units visible to nearly all the British at elevation. I would definitely be able to get freedom of movement without too much effort.

And now for Dan's Pre-Game Comments:
"The Chinese Communists must attack and exit more than 61% of their force. The plan is to have the group across the river on the east side. The group that will cross the river in the center and the group in the river on the west side. Hopefully these groups will all reach the British line at the same time."

I set up to cover as much ground as I could. Dan would win the scenario by exiting 55 VP by game end. Exiting British on/after Turn 6 would increase the number needed. My HIP advance platoon on Board 33 was on the right flank. Were I ever to play this scenario again, I would place them in the center. They were simple too close for the impulse wave that rolled over them.

Sometimes...you just know that the odds are not in your favor.

But this is ASL...so you get back in the foxhole and roll those dice.

Dan's force would advance in three Impulse Groups. They would sweep forward across the river plain and head for the heights, where my boys waited patiently.


My advance platoon would DM a 7-0, but then be overwhelmed by the Chinese. It wasn't a contest.


"General Lee...I have no OBA..."

Death would come quickly up the mountain as Dan's concealed squads went hand-to-hand with my boys. In most cases, Dan would have the ambush and wipe me out nice and clean.


After just two turns, my lackluster defense was falling apart.
.gif)
I didn't get the memo...

Turn 3 - Dan's boys continued their assault. On the right, my wire and some lucky dice would hold them back for a bit. The 10-1 and a crew and a squad would be KIA'd by a snakes roll. My boys were dying in place, but taking some folks down with them.


Turn 3 would be the turn that pretty much wiped the British out as Dan took my boys out in Hand-to-Hand combat.

No, they weren't...

The red circles denote the remaining British forces. I was in dire straits. All I could hope for was to take out any Chinese that I could and slow down any others. It was a forlorn hope.


The end of Turn 4 showed that the Chinese would be able to exit without too much difficulty.

Turn 5 - Dan began moving his units towards the exit.


Turn 6 - Dan had eliminated all the British and was free to move about the country.


At the end of Turn 7, abandoned weapons and foxholes filled with dead Gloustermen were all that remained, except for the stray Chinese units here and there that lacked the movement points to exit. It was game over. But the final tally was exactly 55 VP for the Chinese. It had been that close. The Glousters had taken a few of the enemy with them.
My congrats to Dan on the win. His disciplined attack made effective use of the Chinese advantages to claim a solid victory.

And now for Dan's Post Game Comments:
"The plan worked. The British were wiped out except one wounded 8-0 and the 7-0 with the radio. However, the Chinese lost many units barely able to exit the required amount. Rolling for independent movement failed several times nearly costing the Chinese the game. My thanks to Grumble Jones for a great game of ASL!"

Our next game, played on Saturday would be SP27 Sudden Fury. This is all armor scenario as three Jagdpanthers play holy hell with ten Churchills. And yes, it goes exactly as you would imagine...with nearly all of the Churchills turned into burning canoes.

Designed by Evan Sherry, this scenario is faithful to the historical situation where British armor outdistanced its supporting infantry and was suddenly attacked by three Jagdpanthers that snuck up through the hedges and orchards to slice right through the squadrons of Churchill Tanks.
14 Churchills would be destroyed with no losses to the Jagdpanthers. The 75mm Gun on the Churchills can only knockout a Jagdpanther from the side or rear. I would try a couple deliberate immobilization attempts, but fail.
The Germans win by exiting at least one Jagdpanther off the south edge and if no British Churchill has an LOS to Hexes 11K6 and/or 11I5. ROAR has this scenario with 9 German and 21 British wins. Now that is also a head scratcher. How do the Germans not win this scenario more often?? Well...our game will show you.


The German exit zone is the bottom right-hand corner of Board 11.

And now for Dan's Pre-Game Comments:
"The Germans must attack and destroy 10 British tanks and exit one JgPz V off the southeast corner. One JgPz will prep fire while the other two move and the first move is to get two on the hill to eliminate the British hull down. Hopefully they can get the kills."

The red circles are the two Hexes 11K65 and 11I5 that I have to maintain an LOS to in order to prevent the German victory conditions. By SSR, the Churchills begin the game hull down. Dan would Prep Fire one of the Jagdpanthers. He would not get a turret hit and then Intensive Fire and roll a "10" and MALF his MA. He would fix it in the next Rally Phase. His other two Jagdpanthers would roll onto the nearby hill and by doing so nullify my hull down status to them.


In my Prep Fire Phase of Turn 1 - I would place smoke on two of the Jagdpanthers. It would not help. Dan would successfully destroy both Churchills. Things were going to be very grim indeed.


After accepting the futility of trying to shoot the Jagdpanthers, I would put all of my remaining Churchills in motion and deploy smoke mortars to assist in covering them up. Didn't help as four more of my tanks would be knocked out. Dan's dice were hot and giving him the hits. All he needed to do was hit and not roll a 12 for the effect. And he didn't. I would get four crews during the game. But my personal ELR was just at rock bottom. Watching tank after tank go down was tough.

Dan's Jagdpanther crews were solid veterans and they rarely missed shots.

On Turn 4, I was down to to just two surviving Churchill tanks (circled in RED). In a surprising move, Dan's Jagdpanther with the 10-2 Armor Leader would head to the exit and become the one exited tank that Dan had to have to meet his victory conditions. I suspect that Dan felt fairly confident that his remaining two Jagdpanthers would be able to knock out the two remaining Churchills. 8 of my 10 Churchills had been destroyed, so that was perfectly normal for Dan to believe. But I would keep both tanks in motion and deploy smoke mortar smoke in their hexes.

"Die Panzer 303 und 304 zerstören die restlichen britischen Panzer. wir haben den Sieg!"

Turn 5 German - on the final movement phase of the game, Dan's remaining Jagdpanthers 303 and 304 would move to finish off the remaining two Churchill Tanks. Both Churchills were in motion and sitting in smoke. Dan's Jagdpanthers would both fire in Advancing Fire. Both rolls would be "9's" and two misses. And just like that, it was game over and a British victory. Of course not a victory that made you feel good. I felt that my win was a cheesey/sleazy affair. I did what I had to in order to make my tanks difficult to hit...but that still felt like a lesser way to win a game. But perhaps surviving against the Jagdpanthers was certainly a victory.
Dan had executed a great attack and successfully destroyed 80% of my armor force. In turn, I did nothing to the Germans...zero...nada...nichts...less than zero...
My thanks to Dan for two very fun games, despite the one-sidedness inherent in both. All ASL is fun ASL..even when you're getting you ass handed to you.

So, we all have seen why the Germans don't win this scenario very often. Despite having complete domination of the battlefield, they still have to move and then get hits. All the British have to do is make themselves difficult to hit and keep their LOS to the one or both of the victory hexes. The ability of the Germans to knock out 10 tanks is a tall order. Dan came very close to doing it. Smoke and Motion were my friends. But it ain't a very sexy or satisfying way to win a game.

"No thanks...I'm good...hiding is the only way I can win!!!"

And now for Dan's Post Game Comments:
"The plan did not work. The Germans exited one turn early to avoid the possible stall at start up. Two British tanks survived the end game for the win. Well played by Grumble Jones who used smoke and motion to survive. Congrats to Grumble Jones on the win!"

That's a wrap on another two game ARR.
Dan and I will be playing again tomorrow with Scenario RPT 125 Bazooka Butts.
But no AAR for that one.
Dan and I will return next week to for another great ASL weekend!!
We will see you then!
No comments:
Post a Comment