

After a week off, Dan Best and I found our way back to the cardboard battlefield. I enjoyed my weekend off. So far this year, I have already played five games, which is awesome...but it was nice to have a weekend free from blogging. Sometimes rest is good. And I must say that I am really enjoying the Illuminating Rounds Youtube videos. Dave and Martin are so good and the content of f their discussions is first rate. I look forward to seeing more of their outstanding work.
 It would be my choice to pick the scenario and I would go for something entirely different. I would pick from the North Texas ASL scenario pack - A Fistful of Scenarios. Naturally, anything with Lt. Speirs on it would have to be AWESOME!!! And yes, this pack is pretty awesome!
Dan had already played a few of these, so I picked NTX05 - Victory over the Saar (designed by Ed Beekman) as it was one of the two in the pack that Dan had not yet played.
Most of the scenarios in this pack appear to be fast playing, which is one of the things I look for in a scenario. This one would also have fairly small orders of battle for both sides. Sometimes less is more as my Valparaiso University philosophy professor Dr. Klein was found of reminding me. He had a huge influence on my writing and of course on my thinking. My favorite quote from Dr. Klein was "Scott, just what is reasonable for an adult to believe?" I think of those words often in my life.

This scenario is six turns long and takes place in December 1944 near Saarlautern as the men of the US 95th Infantry Division effected their crossing of the Saar River.
The Germans are the defender in this scenario and are guarding a bridge, which of course the Americans need to capture before the Germans blow it with a set DC. If the Germans blow any of the bridge, then the US Player has to control three buildings instead of 2 for the win.
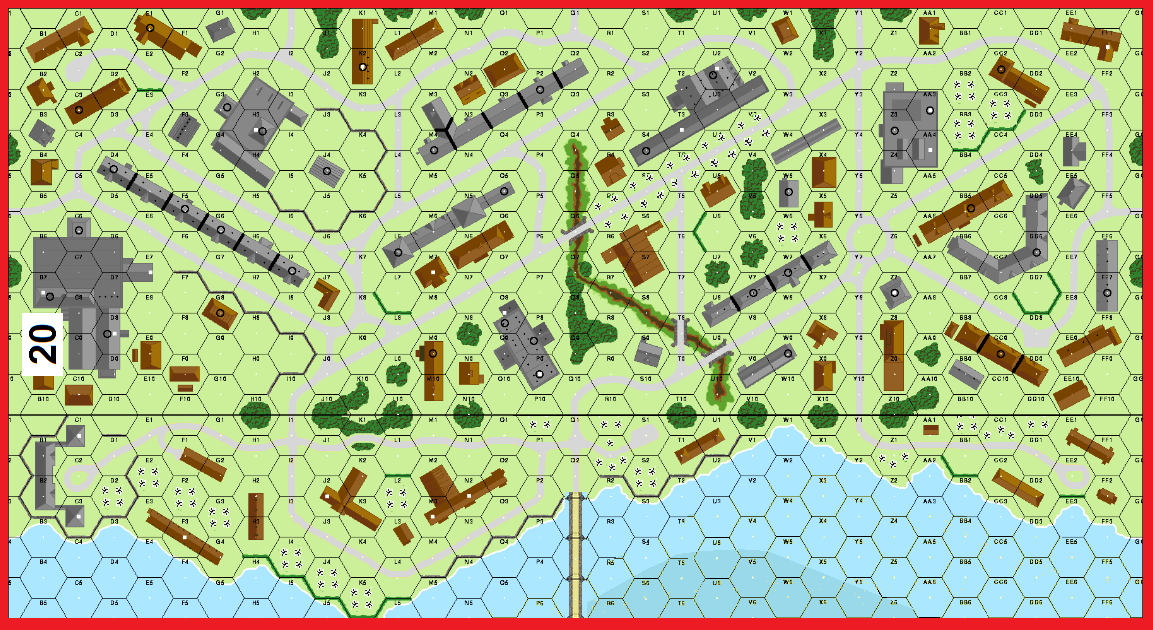
Boards 8 and 20 make up the battlefield and at first glance the scenario looked pretty interesting.
Now if only my dice would cooperate. I had just played the scenario Taking it Back the previous night against my regular St. Louis opponent. both of us had rolled terribly with enough 12's to form a coal train. My frustration with bad rolls had lately started to really grind on me. So we would have to see how tonight went.

The scenario depicts the actions of the 379th Infantry Regiment of the 95th Infantry Division as they surprised German defenders of the 21st Panzer Division as they guarded a bridge over the Saar. In a Remagen Bridge like moment, the men of the Victory Division has secured a bridge over the Saar and would successfully hold it against powerful counter-attacks.

A look at the battlefield.

As the defending Germans, Dan would command the men of the 21st Panzer Division. This veteran formation was a shadow of the division that had been at the forefront of Rommel's Afrika Korps and was first to counterattack on June 6th. By the end of 1944, this division had been severely depleted. But it still had fight in it and would remain a thorn in the Allied side throughout the fighting in Lorraine.
Dan's force would consist of 7 x 4-6-7's, 1 x 8-3-8, and 4 x 4-4-7's led by a 8-1, 2 x 8-0's, and 2 x 7-0's with an MMG and 3 x LMG's with a PSW 232 Armored Car for support. Dan's initial force guarding the bridge would only consist of 2 squads with an 8-0 and LMG. So my Americans would have a chance to seize the bridge if I moved fast enough. On Turn 2 - Dan would receive all the rest of his force, which was substantial.

As the attacking Americans, I would command the men of the 379th Infantry Regiment of the 95th Infantry Division. The 95th Division known as the Victory Division would arrive in Europe in August of 1944 and would gain fame for their actions around Metz. They would be one of the key US Divisions in the fight for Lorraine. The division figures prominently in the movie, Hell is for Heroes with Steve McQueen, Fess Parker and James Coburn.

My force would consist of 1 x 7-4-7, 6 x 6-6-7's , and 2 x 3-4-7's led by a 9-1, 8-1 and 7-0 with an MMG and 2 BAZ 44's.
Mobility, firepower and speed would be the most important aspects of my force. Americans are tough up close and if I could get into get positions near the bridge, I felt that I could hold back the German reinforcements.

And now for Dan's Pre-Game Comments:
“The Germans must try to defend a bridge crossing and four
buildings from the Americans coming through the mist. In reality the two squads are not going to be
able to stop the Americans. Only slow
them down. First, I will set up the
German squads and LMG in building 20S9. This position guards crossing of the
gully and can lay a fire lane through the mist.
The mist is KGP style very heavy which makes combat beyond 5 hexes very
unlikely. the Armored car will set up on
board 8 to the east so whoever, the Americans send after it is likely mission
killed for getting back to the center of the board. Then the reinforcement groups will attack
heavy toward building 8T1 and cross the gully to put a fire base in building
20S9. This will allow an assault on
buildings 20M9 and 20P9. While the
armored car will go to hex 8Q2 and take back control. Hopefully the mist will allow the Germans to
close in and CC will allow German numbers to win the day. The Germans have 12 squad to the American
8. An even exchange in CC will give the
German a victory.”


Yeah...this stuff is annoying as the dust storm on Battlefield V's Hammada map...


Unless you count my squads...


The mist made it nearly impossible to get any decent shots as Dan's boys moved up.


Dan's broken boys were able to melt into the mist and I would hear from them again.


I wasn't feeling very good about my chances...


Turn 4 German would bring more in my face moves by Dan's grenadiers.

Close combat...everywhere you looked!!!

Yep...pretty much...


And now for Dan's Post-Game Comments:
“The plan worked. The
armored car was able to get past the BAZ and get into Q2. The German infantry were able to take back
building 8T1 and 20M9. Also, thanks to
freeing some prisoners the exchange is squads was even at three each. The game was fun with lots of CC and infantry
movement. The mist makes a big
difference. Allowing units to move in
close and minimizing the impact of fire attacks beyond 4 hexes. The Americans could not get the armored car
out of the victory hex and conceded. My
thanks to Grumble Jones for a great game!
Also, my thanks to the North Texas ASL Club for a great scenario. Look forward to playing others from this
pack.”

Dan and I will be back next Saturday for a playing of ASL Scenario 38 - Escape from Derna!
See you next time from the sands of Libya!
No comments:
Post a Comment