

Tonight's AAR will be the final "Our Saturday Game" AAR of 2019. It's been an amazing year of some truly great ASL. Tonight's game would be my 61st game of the year. I've never played so much ASL in a single year. And I'll be honest...I'm not sure I want to play much more than 60 games a year. 5 games a month is a lot of ASL. It's even more so, when you spend additional hours blogging about the game just played. And the blogging typically takes 1-1/2 to 2 x as long to complete as the game was to play. So, yes....I'm exhausted. 2019 has worn me out. And I'm already looking forward to doing it all over again in 2020!!!

For our final game of the year, Dan and I invited Dave Mareske and Paul Works to join us for another 4 player game. There aren't too many scenarios that work for 4 players, but we found one in the ASL March Madness " The Players Pack" from 2018.
MM50 - The Wrong Choice would be the selected scenario. It's a big scenario and would work well for 4 players. Dave and Dan would be the Germans of the 2nd Panzer Division, while Paul and I would take the Americans of Team Booth.

Readers may recall, that we got together earlier this year to play Action at Balberkamp as a 4 Player game. Dave and I had taken the Allies against Paul and Dan's Germans. Paul and Dan would get the win in that game. I was very excited to have Paul on my side. I have had the chance to play Dave and Dan on several occasions, but have only this year gotten the opportunity to get to know Paul better. And as you will see...our partnership as the Americans would be very profitable indeed!!

Now Scenario MM50 - The Wrong Choice is one of my four published scenarios. The Kansas City ASL Club was kind enough to invite me to submit scenarios for their annual publication in both 2018 and 2019. Four of my scenario designs were accepted, play tested and ultimately incorporated into the 2018 and 2019 scenario packs. I'm very grateful to the KC ASL Club for including my designs.
MM50 - Wrong Choice is a big scenario. Mark Pitcavage on his excellent website - Desperation Morale, noted the size of the scenario in his write up for the 2018 March Madness Players Pack. This scenario also found its way to inclusion in at least one of the Midwest tournaments this past year. But I don't believe anyone actually played it. It's size is probably a bit too much for tournament play. And in fact, our playing with four people took seven hours to complete 3 of the 6 turns. So yeah....this is a scenario that will take some time to play. So there is no current ROAR stats for the scenario. This playing will be the first recorded for ROAR.
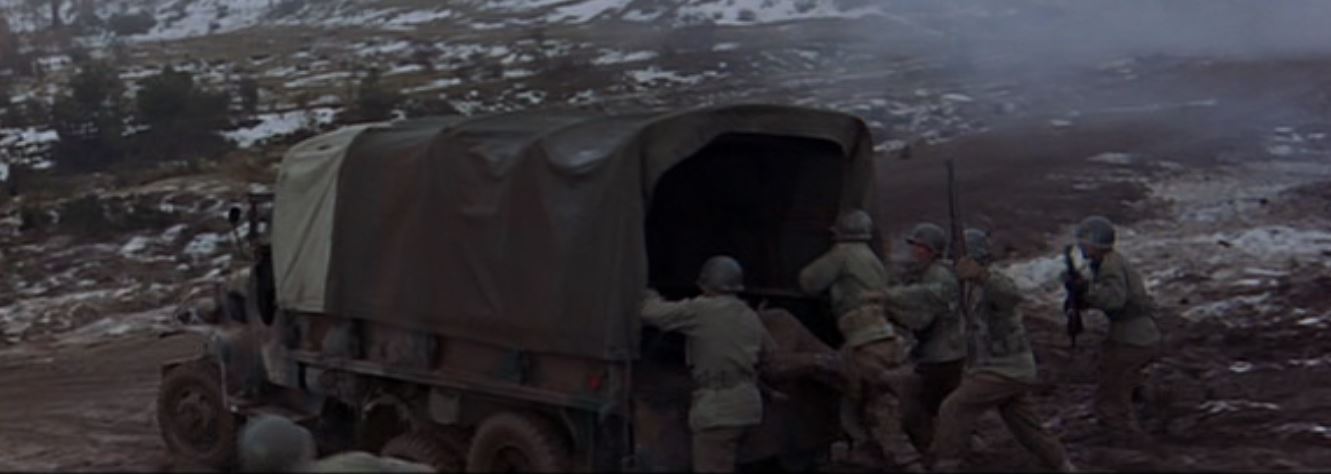
The scenario takes place on December 19th at Hardigny, Belgium. The Ardennes Offensive was into its third day and the Germans were closing in on the outskirts of Bastogne. The US 9th Armored Division has several teams to the east and northeast of Bastogne fighting hard to delay the Germans. One of these would be Team Booth commanded by Lt. Col. Robert Booth. Team Booth was initially tasked with covering the flank of Task Force Harper. But when that Task Force was eliminated, Booth was left without a mission. With elements of the German 2nd Panzer Division and 26 Volksgrenadier Division streaming past his position north of Longvilly, Booth had to decide whether to fall back towards Bastogne of dig in and make a stand in the axis of the German advance towards Bastogne. Neither choice was very appealing. Booth's operations officer was Maj. Eugene Watts. Watts recommended digging in and holding their current position. Watt's pointed out that the Team had plenty of food and ammunition and with Germans all over the place, the odds of passing through to Bastogne were low at best. But, much to Watt's chagrin, Booth gave the orders to fall back to Bastogne. History would show that Booth made the Wrong Choice...

I first read about Team Booth in John McManus' great Alamo in the Ardennes. On pages 183-186, McManus describes the fate of Team Booth in agonizing detail. Booth led Team Booth towards Bourcy where the Team would light up several recon half-tracks of the 2nd Panzer Division. As a result of this contact with the 2nd Panzer, Booth would alter his route away from Noville to the west and instead would head north towards Hardigny. During this time, Booth would attempt to mount a moving half-track, he would slip on the running board and break a leg as the half-track wheel went over it.
The column of Americans would reach Hardigny and sweep aside some isolated German elements before finding themselves smack in the middle of an assembly area for the 2nd Panzer Division as they prepared to assault Noville. In the confused firefight that followed, Team Booth would be wiped out, with survivors led by Major Watts fleeing into the woods and heading south towards Bastogne. Lt. Col. Booth, unable to escape was captured.
 After reading this account, it struck me as a great scenario. But I was really confused as to how Team Booth had moved as it went to Hardigny. McManus book didn't have a map showing the movement. But then I would purchase the latest edition of World at War Magazine.
As I flipped through its pages, I would see a map and lo and behold, there was Team Booth and a blue arrow showing its movement to Hardigny. But as I looked at that blue arrow, I just kept questioning...why move to the northwest instead of directly west towards Bastogne. The answer lies in the road net, which the map showed. With Longvilly in German hands, Bourcy was the only reasonable destination. And then once Booth encountered Germans there, he made the decision to head to Hardigny rather than on to Noville.
The scenario attempts to place the American Player in the role of Booth. The scenario victory conditions give the Americans the immediate win if they can exit 22 or more EVP off the south board edge. It also gives the German Player the immediate win if all American vehicles are destroyed or recalled. And lastly, if neither player gets the immediate victory, then the player controlling three of 4 specified locations is declared the victor. So in short, the US Player has to decide...do I make a run for the border and exit or do I hunker down and hold the victory locations. Neither choice is necessarily the right choice...but either could be the Wrong Choice.

Another great map found during a Google search that shows the movement of Team Booth. If memory serves, Team Booth traveled at some point along a rail line, which may explain the wide movement around Bourcy. It's hard to imagine the feelings of the GI's in that team, not knowing if or when they would run into the Germans.

Interestingly, Hardigny would be the scene of a major Battle of the Bulge 75th Anniversary reenactment.

It was also very cool to play a Battle of the Bulge scenario on the 75th Anniversary of America's greatest battle.


In 1973, as an 8 year old, I would read my first full book...naturally...it would be The Battle of the Bulge by John Toland. As a kid, the Landmark series of history books would be my primary reading material until about 8th grade.
I still remember the night I finished reading this book. Ordinarily, I had a very strict bed time, but my mother knew I was nearly finished with the book and let me stay up late to finish it. Still a great memory after 47 years.
As a kid, the Battle of the Bulge just fueled my imagination. It terrified me to think of GI's trying to hold off the German Waffen SS and tanks in the dark forests of the Ardennes.


Another great book from my childhood is The Bulge, which was published in 1966 annd tells the story with 1/32nd scale toy soldiers and tanks. It is an AWESOME book even 53 years later. I finally found a copy on Ebay many years ago and it remains a cherished volume in my library.
There are two other volumes in this series on Gettysburg and Trenton. But neither of these is as good the The Bulge.


A look at the scenario battlefield as depicted on the ASL Archive website. An awesome rendering of the maps. This scenario combines an MMP map 2a with two from Bounding Fire Productions, BFP-P and BFP-Q.

Dan Best and Dave Mareske would command the Defending Germans of the 2nd Panzer Division. Created as one of the three original Panzer Divisions, the 2nd would see action in Poland, the Balkans and Russia. Following disastrous losses at Kursk, the Division would be sent to France to refit. It would be heavily engaged in Normandy and be decimated at Falaise. Rebuilt, it would particpate in the Ardennes Offensive and in the defense of the Rhine before surrendering to the Americans.

The German force would consist of 10 x 4-6-7's, 15 x 4-4-7's and 3 x 5-4-8's led by a 9-2, 8-1, 3 x 8-0's, and 3 x 7-0's with 2 x MMG's, 6 x LMG's, 2 x Panzerschrecks and 2 x 50 MTR's.
Armor support would consist of 2 x Panthers, 5 x MKIV's, 5 x Stug 75's, 2 x Stug 105's, 2 Jagdpanzer IV's, a Kubelwagen, Wirbelwind and 3 x Half-tracks.
The Panthers, Wirbelwind, 9-2 and 5-4-8's would not enter until Turn 2 and have a long journey from the east board ede to the fighting. Groundsnow would prove to be a serious impediment to swift movement.

As the attacking Americans, Paul Works and I would command the men of Team Booth of the 9th Armored Divison. The 9th Armored Division nick-named "The Phantom Division" would be formed in 1942 and be cited for extraordinary heroism during the Battle of the Bulge as its units help delay the German drive on Bastogne for nearly six days. It's sacrifice enabled the later successful defense of Bastogne.

The American force would consist of 10 x 6-6-6's and 10 x 5-4-6's led by a 9-2, 9-1, 2 x 8-0's and a 7-0 with a 50 Cal HMG, 2 x MMG's, and 5 x Bazookas.
Armor support would consist of 4 x M18's, 3 x M7 Priests, 2 x Stuarts, 2 x M8 Greyhounds, 5 x Half-tracks, 4 x Trucks and 2 x Jeeps. This force would have to survive in order to prevent the Germans from gaining an immediate win with its destruction.


" The Germans in this
scenario must prevent the Americans from exiting, or capture the cross roads on
Board BFP Q, or destroy all the American AFVs.
Dave and I had a simple but good plan.
The majority of Germans would set up on Board Q and assault through the
village toward the crossroads. With a
screen of infantry and AFV on board P. 5
tanks would set up on Board Q to help the infantry with smoke. The Turn 2 reinforcements move across board
2a and will help crush the Americans in the vice. The screen force would attack if the
Americans did not push to exit the board.
Hopefully the Americans go for exit and get crushed between the Village
attack hammer and the screen force anvil."

"After consulting with Dan,
we would set up to prevent the Americans from exiting. The Americans have lots of fire power and I
hope to withstand their first onslaught, then be in position to pick them off
as they try to exit. I am counting on
Dan's infantry to eventually take back the victory hexes if the Americans stay
and fight."
 And now for Paul Works Pre-Game Comments:
“Scott and I had the
Americans (infantry and vehicles, respectively) in this one vs. Dan and Dave
(infantry and vehicles respectively). I had play-tested an earlier version of
this one, but so had all the other guys!! 😀 As the Americans, we had two options:
go for the exit or defend the village and VC hexes. After viewing the German
setup, with most of their assault guns and tanks covering the exit, we briefly
considered trying to exit, but decided against it for the following reasons: 1)
our infantry might get pinched from both sides as the woods narrow toward the
exit area, 2) it really looked like my vehicles would get massacred attempting
to get through/by the gulley toward the exit area, and 3) four German vehicles
(all CE) and several big stacks of German infantry set up so we could see them
if we chose to do so. So... Scott set up a couple kill stacks vs Dan's troops
and I set up multiple tanks and M7s to see Dave’s assault guns. We set up all
our BAZs in the woods-line covering the only pass through those woods and the
open flank on the back-side of the village. I put the ACs on the back-side as
well; the 37LLs don’t have a great To-Kill vs the STUGs, but reasonable odds if
they hit the Pz IVs in the turret. One other plan element was that we put some HS
passengers in some of our HTs; on the first turn, we had them and the crews of
our armed jeeps exit those vehicles and take a bunch of heavy weapons out. Our
plan was to slow the Deutschers down on the back-side and overwhelm them on the
side with the three VC hexes and hold the latter to the last.”

Ok...on to the game!!

Dave, Paul and Dan would all be together at the Hollis Renewal Center-Kansas City, MO, while I would be on the other end of the SKYPE session in Quincy, Illinois. Dan and Dave would leave the room briefly for Paul and I to decide on our strategy. We briefly considered making a run for the exit, but quickly realized that we would be trapped and probably annihilated on Board BFP-P before we could exit the required 22 EVP. So we decided to pummel the Germans facing us on the west edge of the Board BPF-Q village. We would hold onto the 4 Victory Locations and force the Germans to take them from us.

Paul and I had made our Choice...would it be the right one,,,?


Our future would hinge on Paul's good shooting with the 4 x M18 Hellcats.


Dan's 8-0 kill stack on the south side had gone berserk. We would wait for their charge.


They would not survive.


German Grenadiers were also moving north through the woods towards the village.


The primary objectives of the US infantry were nearly achieved.


A German hero in S3 with a Panzerschreck had to be taken down in Close Combat.

5 to 1 odds took him down.


On the east flank, Paul would take down another MKIV and keep our flank protected.


Our perimeter around Hardigny was still intact.
 Our GI's also managed to capture some Germans on the hill.


We retained control of all 4 Victory Locations.


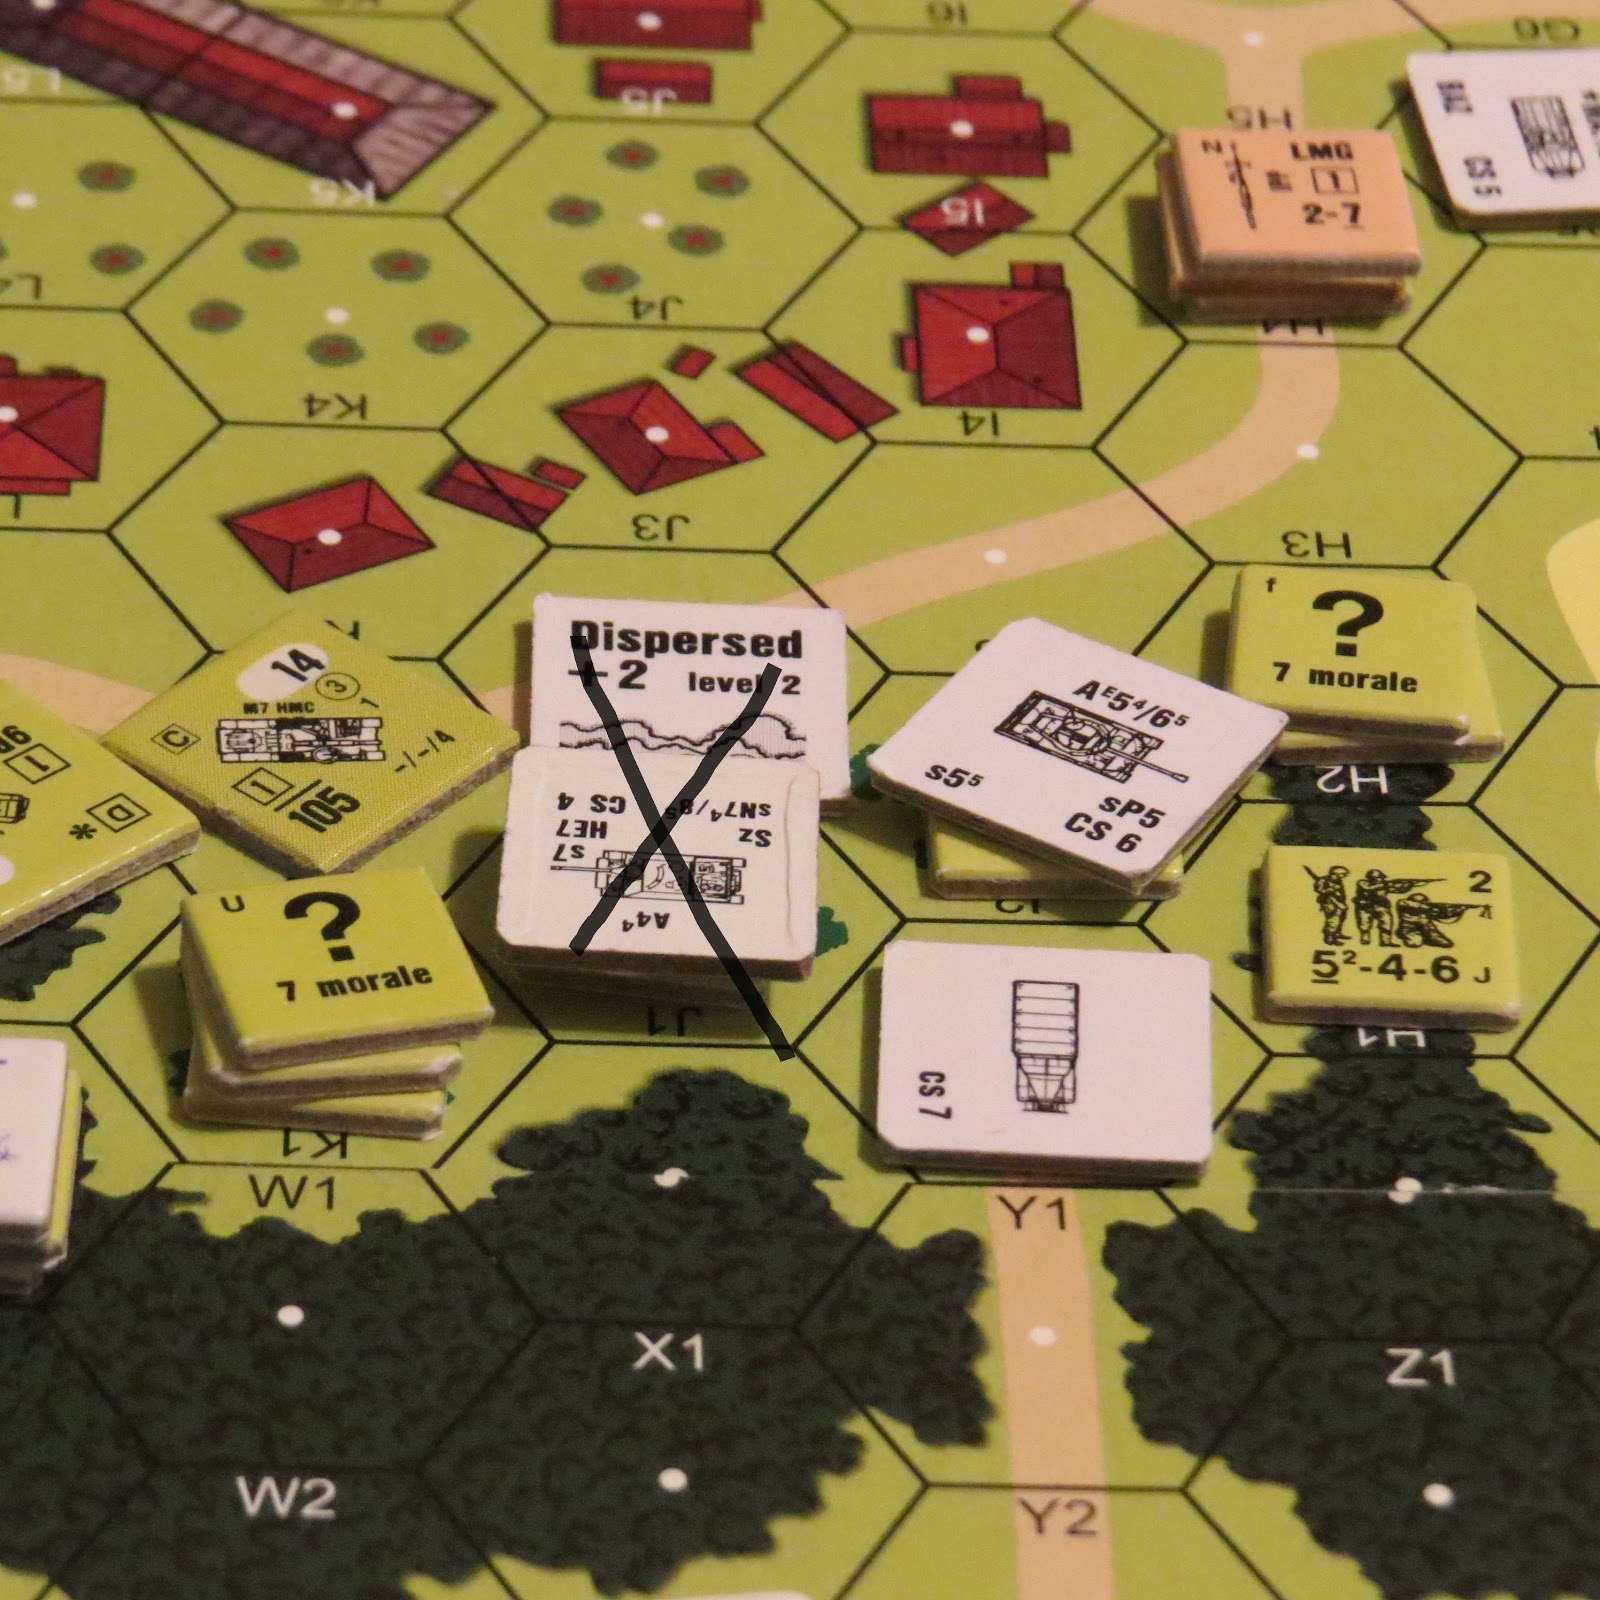


The German Grenadiers had suffered heavy losses (nearly 12 squads KIA'd or captured) and the German Panzers were down six tanks. The hour was late and the US looked likely to hang onto the three Victory Locations needed for the win.

The final German effort as Turn 3 came a close.


It had been a tough fight, but our GI"s had secured the win.
 And now for Dan Best's Post-Game Comments:
“The plan did not
work. The Americans did not go for
exit. Instead they took the fight to the
Germans in the Board Q village and with a devastating opening prep fire
destroyed 4 of the 5 support vehicles and the two kill stacks losing the 8-1
and 6 squads. Including both MMG. The Americans then unloaded the crew and MGs
from the half tracks and set up a perimeter with the 50 cal and MMG firepower. The Germans then tried to kill the American
armor and succeeded in trading kills however the American ended the game with
tanks remaining and with a secure hold on the village crossroads. Well played by Paul and Scott. A better tactic would be to keep a better
screen toward the exit and if the Americans do not come out then assault into
the village on turn two with all German forces.
The initial American prep fire is something to avoid. The scenario is good and like all large
scenarios and great replay value.
Looking to try this one again as the Germans. My thanks to Dave for giving it a try with me
as the Germans. Congrats to Paul and
Scott for a good American win!”
 And now for Dave Mareske's Post-Game Comments:
"Since the Americans did
not go for the exit, I needed to move all my tanks toward the village and put
pressure on them. Dan's infantry took a
big hit on the first turn and I would eventually lose three SP guns that I was
counting on for their smoke exponent to help mask the counter-attack. My vehicle reinforcements would take a long
time getting into the battle so we decided to call the game after turn
three. After some conversation after the
game, this one favors the Americans and I would like to play it again with the
German balance, hoping that added pressure would give the American's pause to
consider exiting over defending. Moving
through the snow takes time and is tedious.
Good game...always a good day when you can play ASL with friends."

“On turn 1, Scott’s
infantry blasted several German stacks and he was able to get infantry into the
buildings on the far side of the road covering the VC hexes. He did not get one
big stack completely broken aliveness after a 30 + 1 shot... but, that did not
end up being a big deal (see below...). My four M18s put on an average show.
Even with 2 ROFs, just one kill total - and in a total gack, I X’d out one of
their MAs in an intensive fire shot. Doh. Fortunately, my Priest crews came
prepared. One Priest did not have Heat, but a nice HE shot shocked one of the
STUG’s CE crews; that ended up as a kill two player turns later. My other
Priest did have Heat; it killed the other STUG that my M18s missed. In
addition, it kept rate (!) and hit the infantry stack that our 30FP did not
get. Blam! The entire stack broken. Another rate shot
(!) Blam again! And that’s all she wrote for Dan’s best leader and that whole
stack. Our HTs/jeeps unloaded two .50cals and two MMGs with crews and
passengers; this allowed us to have extremely heavy FP covering the woods line,
even though we did not have a lot of real infantry personnel over there. In
subsequent turns, Scott did an awesome job crushing all German infantry
resistance on the hill near the VC hexes. I left a few tankies on that flank to
support him and protect against the remaining Pz IV and two, later-arriving
STUGs. Only scare was when Dave drove his Pz IV up on the hill and had a decent
shot at Scott’s 9-2 and two squads. The leader and one squad survived that. I took
out the panzer with a two-sided attack with a Stuart and an M18, losing my
Stuart in the process - but worth it (sadly for the M5’s crew, though). On the
back-side, my two ACs held their own by holding up three German tanks. Dave
missed a ton of shots (many by one). This delay in killing my ACs allowed me to
position two Priests and one M18 to help cover that side. More importantly, it
allowed Scott’s infantry to take out two German tanks with his bazookas (one
with a sweet crit hit!). On the crazy plus side for the Germans, their sniper
took out (on two “1s”) one of my HTs and one of my ACs. At this point, Dave’s reinforcing
troops/Panthers were closing in. It was likely that the Americans would not be
able to hold the fourth VC hex (as even my M18s’ 76Ls would have trouble vs the
Panthers’ frontal armor). However, there were very few remaining German
infantry - not nearly enough to dig our infantry and supporting armor out from
the other three VC hexes. Dan and Dave conceded at that point.
Totally fun game; in part
because Scott and I won (😀),
but more so because we had a lot of laughs and a great time. This is the second
4-player game I have done with Dan, Dave, and Scott and both have been a blast.
Thanks guys!!”

My thanks to Dave, Paul and Dan for a awesome final scenario for 2019. It was an epic game!


Dan and I will be back next Saturday to kick off 2020 with a playing of ASL Scenario 37 Khamsin!
So Heia Safari!!!
Been looking for a copy of that old Bulge book--used to check it out from local library as a kid all the time.
ReplyDelete