

Well...here we are with our Saturday Game. Pretty awesome weekend of ASL was had as I type this AAR. Dan and I managed to get in two really good scenarios. Our Saturday game would prove to be the most mentally taxing of the two scenarios and came down to the final movement phase before it was decided. We selected a scenario from the new Le Franc Tireur No. 14. I was eager to use my new Italian counters. My Hollow Legions counters are pretty ragged these days. The scenario we picked was FT 242 That Bridge Again. This scenario is new enough that there were no recorded playings in ROAR or the ASL Archive. So Dan and I would be the pioneers blazing the AAR trail for this very well-done scenario (designed by Steven Swann).

This scenario is set during the Sicilian Campaign in the earliest days of Operation Ladbroke. Most of us are familiar with Operation Fustian which dealt with the British Para landings at Primasole Bridge. Operation Ladbroke involved the British seizure of the Ponte Grande Bridge near Syracuse. The bridge would needed to speed up the advance of British forces landing south of Syracuse.
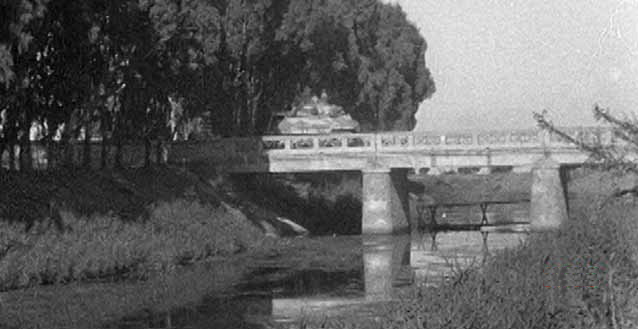
A view of the bridge after the fighting, as British armor passes over it.

Gliders of British 133 Glider Platoon of the 1st Air Landing Brigade would land in and around the bridge. Less than 90 British Paras would make it to the bridge in time to try and hold off Italian assaults by Coastal Battalions and men of the 75th Napoli Infantry Regiment.
With scarce ammunition and forced to defend both ends of the bridge, the Paras would be reduced to 15 men and forced to surrender.
The British 1st Air Landing Brigade would suffer significant losses during Operation Ladbroke.


On Turn 1, Dan would receive reinforcements (could enter along the east./ north / or west edges. Dan would have this force enter on the east edge south of the river. This force from the 1st Battalion, 75th Napoli Infantry Regiment would consist of 10 x 4-4-7's, 2 x 2-2-7's, led by a 9-1 and 8-0 with an MMG, 2 x LMG's and a 45 MTR. While Dan's force would be numerically strong, the Coastal Battalion would suffer from low morale and fire power. Leadership would also be weak for the Italians.


And now for Dan's Pre-Game Comments:
"The plan for the Italians is to attack from both sides of the bridge and see where the British are weakest. The coastal Battalion will attack from the north. I will take the MMG as the variable unit and put it a squad and one 7-0 with the radio up in the level 1 location of the building to over watch and rain down OBA. The 8-0 will lead a platoon from the center and the other 7-0 will lead a platoon from the east. They will attack through the woods. The 8-0 will have the DC since he is elite and can use it without penalties. The Napoli will attack from the south west. The 9-1 will lead a kill stack of three squads and the MMG. The 8-0 will lead a kill stack of three squads and two LMG. The crew will take the MTR. They will enter and move through the woods and grain to attack the bridge from behind the wall. Hopefully the Brits will be crushed between the hammer and anvil."


 Dan began things by sending a spotting round, which missed the mark and landed next to some members of the Italian Coastal Battalion...who were none to happy to have that round land nearby...Dan's 7-0 would be sure to correct it and would do a solid job throughout the scenario of hammering my positions with 80mm OBA.


Dan's boys would find it hard going on the north side of the bridge.


Going into Turn 2 - my perimeter was still intact.


I had tried to get away from Dan's spotting round, but he corrected and brought the pain on top of three of my units. But...things would go better than expected as I would create a Hero, who would come in very handy as the battle progressed. Only a single half-squad would be broken by the first salvos of OBA.


Dan was able to create a couple serious kill stacks.


MAYHEM....pure ASL MAYHEM!!! And it's soooo AWESOME!!!


Dan's ARTY stayed active throughout the game.


"HEY now...I'm telling this story and that was a bad idea!!!"


My boys prepared themselves for the final Italian rush on the bridge

"HERE THEY COME LADS!!!"


With the bridge secured, the boys from the beaches could begin their tour of Sicily!
My thanks to Dan for a great game and a great weekend of ASL. I'll see you in Kansas City on the 14th!!!

And now for Dan's Post-Game Comments:
"The plan did not work. The northern attack was disrupted by British fire and a counter attack of the British hero aided by a sniper attack. Without pressure from that side the British were able to keep their position to shoot the fire lane down the bridge. While I was able to clear the south side. I could not control the bridge and north side entrance. Well played by Grumble Jones! Especially the placement of the British MMG for maximum fire lane efficiency. Fun game but drawn out with the Italians falling short."

Dan and I will be off next week and then the following week we'll be playing some awesome ASL in Kansas City. We'll be back on Saturday the 23rd of March for a playing of ASL Scenario 124 On The Borderline.
We'll see you then!!!
No comments:
Post a Comment