

In a nice rarity, my regular STL opponent and I were able to a Friday game again this week. We had both decided to play all of Broken Ground's Mouse Pad scenarios. So next up would be PAD2: The Quick and the Dead. The size of these scenarios is particularly appealing to my STL opponent as he prefers small scenarios that can be completed in 2-3 hours. That is of course a tough requirement as few ASL scenarios out there can be played in that short time-frame. But fortunately, these mouse pad scenarios play quite quickly.
Scenario PAD2: The Quick and the Dead (designed by Pete Shelling) follows the actions of Sovaks and Soviet forces during the fighting for Tuapse, Krasnodar in August of 1942. It is a 5-1/2 turn game. The Victory conditions are centered on two 76 ARTY pieces belonging to the Soviet forces. The Slovaks win with the capture or elimination of both ARTY pieces at game end.

Tuapse was one of the key ports during the German campaign to conquer the Caucasus region.
A large number of Axis Minor Forces would accompany the Germans during this campaign.

As the scenario defender, I would command the Soviet 68th Marine Brigade. This force would consist of 2 x 4-4-7's, 2 x 2-2-8's, with a MMG, 12 Mine Factors, 4 x Trenches, 2 x 76 ARTY's led by a 7-0. On Turn 2 the Soviet player could choose between two reinforcement groups A) had 2 x 4-5-8's, 2 x 6-2-8's, with an 8-1, 8-0, a DC And Flamethrower or B) 5 x 4-5-8's with 9-1, 8-0, LMG and DC. The choice had to be made before play began. I selected B due the quantity of squads and longer range of the 4-5-8's.

 As the scenario attacker, my STL opponent would command the 1st Mobile Slovak Division. This force would consist of 3 x 4-4-7's, 6 x 3-4-7's led by a 9-1, 8-0, 7-0 with 2 x LMG's, and a 50 MTR for support.
While a large force in terms of squads, it's fire power would be challenged to take out my well protected forces.

With only 2 squads to defend my guns, I was genuinely perplexed on how best to defend. I thought about putting the guns on the two 2nd level hill hexes with the trench in front and just hold the high ground against all comers. But since my reinforcements had to come in along the NE edge, I felt like that would take them too long to get to me. So I stuck the guns out sight and defended them from both sides. I would also have two Dummy Stacks.

I would have to hope for the best and that my boys didn't break before my Turn 2 reinforcements hit the board.

Scott sent his boys in on a wide front. He had momentarily forgotten where my reinforcements entered from.


I went ahead and fired my MMG at the first opportunity. It would prove helpful.


Scott continued to Prep Fire on my MMG position and then sent boys straight ahead and then diverted some squads to act as a welcome committee for my reinforcements.

I moved my turn reinforcements right into Scott's boys and close combats ensued.

I had a three to 1 against a Slovak 3-4-7 with a 9-1 officer and I couldn't get it done...this would have terrible consequences.


MELEE was a really bad deal for me. I needed to get my boys down to support my guns. Being locked in Melee worked for the Slovaks.

My mines contributed to my defense. A Slovak 3-4-7 would get clobbered to a 1/2 Squad in the mine filled woods.


Now...a chain of events would begin that would hurt me in the ongoing Melee. The Slovak sniper would hit the hex and one of my 4-5-8's would be pinned. Not good...


The Slovaks Died Hard!

With time getting late, the Slovaks had to start getting up to my guns. One intrepid 3-4-7 made the journey and was met with fire and fury from an adjacent 76 ARTY.


I succeeded in breaking the Slovak 9-1 stack and sent them routing back.

Scott sent his last 3-4-7 on the NE portion of the field into CC with m boys. He would once again stop them with a MELEE result.


One of the bad aspects of the game play during our Friday game was the high number of "12's" my opponent rolled. He was averaging one a turn and during his rally phase he would roll back to back boxcars...which would KIA a half-squad and wound his broken 9-1 who shot himself while waving his pistol to rally the boys.

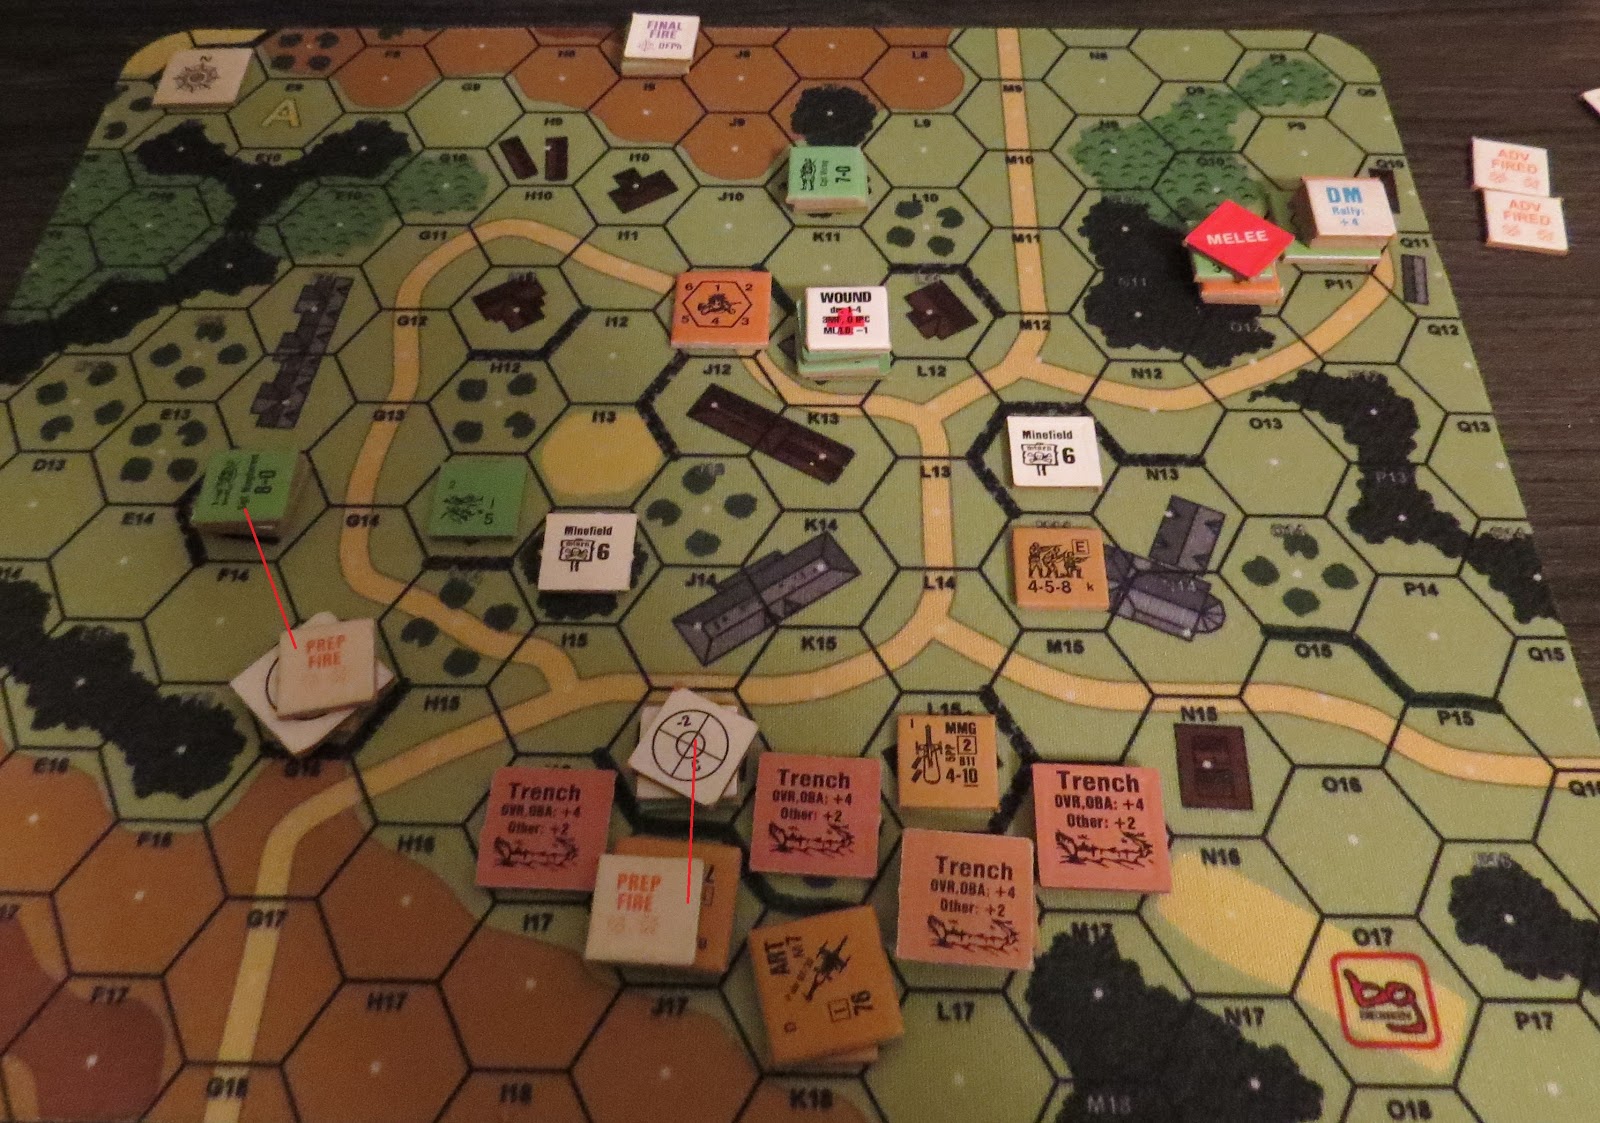
My 76 ARTY would successfully defend itself against the single Slovak squad. Scott continued to put fire down on me, but his low firepower coupled with my positive terrain modifiers was making his fire largely ineffectual.

As Scott's 3-4-7 Slovak squad broke and routed away from my guns, I could breath a sigh of relief. The Slovaks would not get any closer to my guns.

At this point in the game, I had managed to eliminate the Slovaks in the northeast section of the battlefield and I had held in the center and along the left. A Slovak 1-3-7 made a dash, but didn't make it. My 4-4-7 had rallied and went back to their position with my MMG.

As turn 5 concluded, I had my boys in the best positions I could have hoped for.


As we concluded the first half of Turn 6, my opponent offered the concession and my Russians would have the win.

Scott and I will back next Friday to face off in PAD3: Earning Face. I recently lost this one as the Chinese against Dan Best's Japanese. I will once again lead the Chinese and hopefully redeem my earlier performance.

And so we shall!
No comments:
Post a Comment