

Our Saturday game was ASL Scenario AP85 Slicing the Throat. Personally, I found the scenario title to be very apt as I very neatly sliced my own throat on turn 3 of this very enjoyable scenario. I had taken a week off from ASL to celebrate my 29th Wedding Anniversary and it was actually nice to have the downtime. My regular STL opponent continued to have technical problems and so our Friday game did not occur. Ancient computer equipment and a cheap @ss interent provider are the main culprits. Hopefully, this will get taken care of and we can resume our Friday games.
 In the meantime, Dan Best and I were again pushing the cardboard on a Saturday night. It was my turn to choose the scenario and so I picked Slicing the Throat. It would only be my second time ever actually playing the Japanese. The other time was this year at March Madness. It's astonishing to me to think in thirty years of playing this game...I have only been the Japanese twice. And well...it showed!!!
On the other side of the field, Dan would have the 6th Burma Rifles consisting of 4-4-7's and 4-3-6's. At first glance not a sterling force. But...Dan would have 12 squads to go against my 12 x Japanese 4-4-7's. So...it would be a fairly even contest from my vantage point. Although, I do believe a more veteran Japanese player would probably have made short work of the Allied Force.
Dan as the Allies, would be the defender, while I would be the attacker. One of the things that threw us a curve was the Victory Conditions. Initially, Dan and I got them wrong. We both thought that only the Japanese got points for controlling buildings. I noted on the ASL Archive that we weren't the first players to have that misunderstanding. After Turn 2, Dan I and began to question our understanding of the VC. At that time, the Japanese had amassed more CVP than the British. So we both laughed that my Japaneses could just hunker down and force the British to come at them. That's when the light went off in both our heads and we realized that the British had control of all buildings in their backfield (a substantial) number. So the British were in fact winning the game...not my Japanese. So...in Turn 3 you will see some wild moves by my Japanese.


Hey...we can't always be brilliant!!!

I started off trying to drop some WP on Dan's Bren Gun Carrier in N12. After several attempts, I did succeed. With that accomplished my infantry pushed off the start line and successfully moved ahead.

Overall, my two mortars wouldn't do too much.

My aggressive moves on Turn 1 went well and I managed to get into the positions up the middle where I had hoped to be by the end of the turn.


Dan's first line of defense consisted mainly of 2-2-6 Half-Squads. The Bren Gun Carrier on the hill proved a formidable opponent. In CC, my boys managed to immobilize it. The 2-4-7 crew would abandon it and move away. They would continue to be a thorn in my side.

My Arty, would ultimately succeed in brewing up the abandoned Carrier. But in hindsight, it would have been more valuable to have captured it.
Turn 2, I continued my movements forward. I succeeded in eliminating a couple of the 2-2-6 and a bunch of dummies that were in the axis of my advance. The British 8-1 and MMG revealed themselves at this time and gave me a bit of a scare.


As it turned out, Dan had placed his strongest assets along the P Hex wood line on the south part of the map. Dan had correctly ascertained that the best chance for a breakthrough was in that area.

Dan would make a lot of good moves during the game.

As stated before, Turn 2 was when Dan and I realized how the VC actually worked. As a result, I realized that I had to get moving or I'd never get into the building rich backfield.
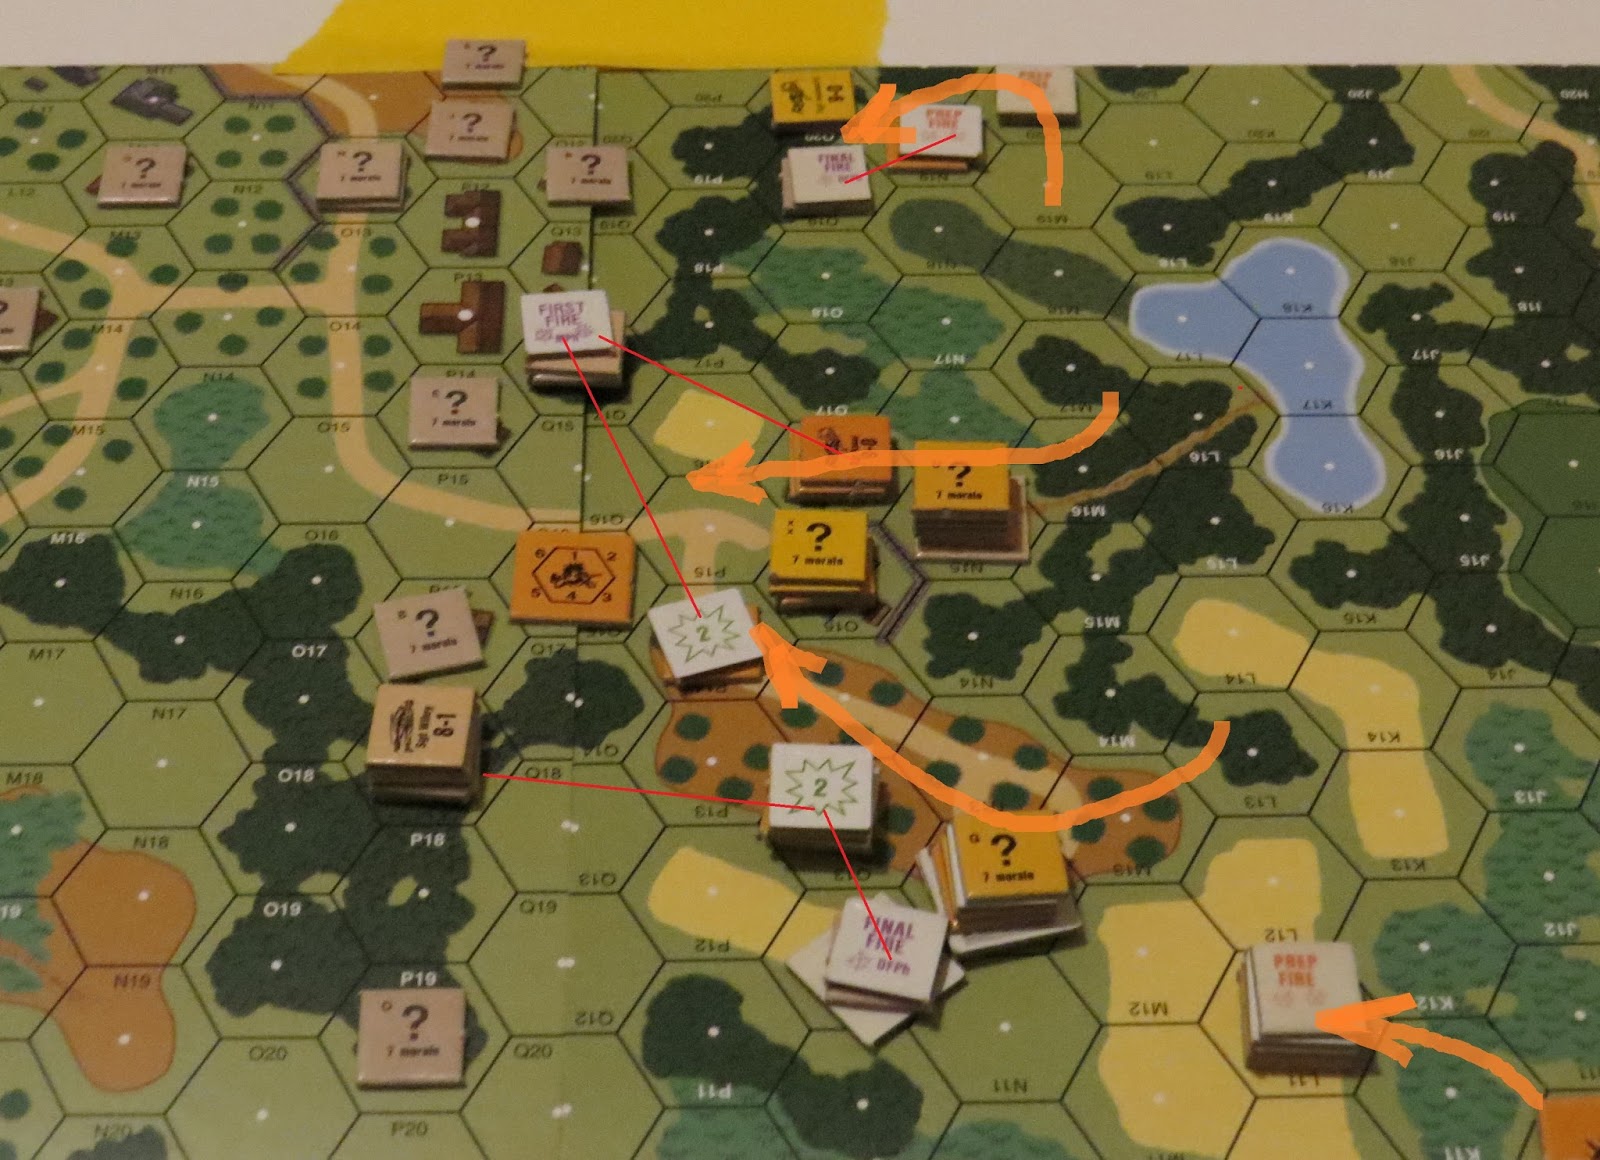
I launched three separate Banzais and sent everyone else forward as if it was the last turn of the game. (Funny...how self-fulfilling that was!!!).

There's just something about a Banzai Charge in ASL that is just huge fun!!

My reckless charges resulted in some breakthroughs in the south...but none of the three squads that made it through were stronger than a half-squad. My casualties had been severe. Some squads were KIA'd on the spot, while others striped, ELR'd or otherwise were degraded. Dan's boys ripped into my charging infantry. And then in Advancing Fire, my boys did absolutely nothing.

My charges had managed to get me toe to toe with the British MLR. But the cost had been too high. My forces were critically reduced as a result of the Banzai Charges.

One of the more remarkable aspects of the Close Combats, which followed the Banzai Charge was just how well Dan's 4-3-6's performed. The close combat against Dan's 8-1 officer stack resulted in mass death as both sides were eliminated in CC. My 9-1 died along with Dan's 8-1.

The Banzai Charges had been awesomely fun to conduct and the Hand to Hand contests with Dan's boys were equally fun. ASL is really at its most exciting in these kinds of moments.
But then Dan's 7-0 Officer Stack rolled snake-eyes. In the blink of an eye, three Japanese Half-Squads were eliminated with no chance to hurt the 7-0 stack even though I had rolled their elimination. The snake eyes just killed me...literally.

Dan's, 7-0 Stack would go on to take charge of the battlefield. Had my Japanese eliminated the 7-0 stack and then survived, the game may have ended very differently...but instead, my valiant Banzai Charge has resulted in the destruction of my force.


Despite the brutal losses, my Japanese had sustained, I continued the fight. There was still the slight chance, that my remaining forces could get into the British Backfield and start taking building locations.

Dan wasn't about to let that happen, so he went on the offensive in Turns 4-6. Essentially, he conducted a mopping up action as my forces were isolated and unable to support one another.

Who knew mopping up could be so much fun!!!

Dan's second Bren Gun Carrier had also moved forward to help mop up my boys, but its overrun attack would ultimately result in the Japanese capturing it. A last success for my Japanese.
My boys would take the Carrier for a nice joy ride!!!


I can't remember the last time I had captured a vehicle in Close Combat.

Meanwhile back in the north, the British were finishing off my remaining forces.

A final three CC's would pretty much wrap up the game.


My remaining forces were 2 x 2-2-8 Crews. One had the captured Bren Gun Carrier and the other was still with my Arty.

With the game basically over, Dan was gracious enough to allow me to play it out for the remaining turns. This allowed me to take my capture carrier on a little joyride into the British backfield.

The final act of the game was watching my captured Carrier conduct two overruns on the British who had surrounded it.

The view of the map as the time ran out on my Japanese. Dan had successfully annihilated my force. It really was a complete Allied Victory. While the Banzai Charges had been a blast to conduct and play out...they were ultimately my undoing. I never recovered from the losses sustained in making those charges.
Kudos to my opponent for a great game and a great win.
We shall meet again comrade and we will have HOT ZEMLYANKAS!!!!

No comments:
Post a Comment