
May 2020 has been an amazing month for ASL. Tonight's game will be the 9th scenario played thus far in May. And I expect to play at least three more. Good grief...12 scenarios in one month. I can remember when 12 was a good year!!! Once again, COVID-19 gets the credit as I will be on forced vacation for the next week. And with no where to go...ASL will be the primary vacation activity...well that and cleaning windows...my wife is my non-work boss. So, I'll be busy enough for sure this week.

Now a Monday game is a rare event these days. The last time I played Monday games was back in 2015, when Scott Holst and I got in a few games. Fun memories.
After my Pacific Caves debacle., I was pleasantly surprised when Dan suggested playing ASL Scenario 187 - Morgan's Stand. This scenario was previously published as G30. ROAR has that version of the scenario with 20 US and 20 Germans wins. The ASL Archive as it with 10 US and 5 German. The Yanks 3rd Edition version would be our choice for the evening. ROAR has it with 10 US and 10 German wins. The ASL Archive has it with 4 US and 0 German wins. The ROAR results show this scenario (in both versions) to be completely balanced. The ASL Archive would lead me to think it's Pro-American. So we shall see shortly if it does in fact lean pro-American.
Designed by Dave Sisler, this scenario is set in Bar-Le-Duc, France in September of 1944. Normally, when we all think of September 1944, Arnhem comes to mind. We often forget that fighting was raging along the entire Western Front as well as Italy. Additionally, this scenario depicts a weakened American force trying to stem a German counter-attack. So, looks like great fun to me!!!


It appears that this bridge will be a centerpiece of the scenario. The German player wins at game end by controlling hex 7AA5 or ensuring that there are no good order MMC's on Board 10. Personally, I like the and/or victory conditions. It makes the defense less rigid and gives the attacker greater flexibility to achieve an objective and not necessarily telegraph which one he is trying to achieve.


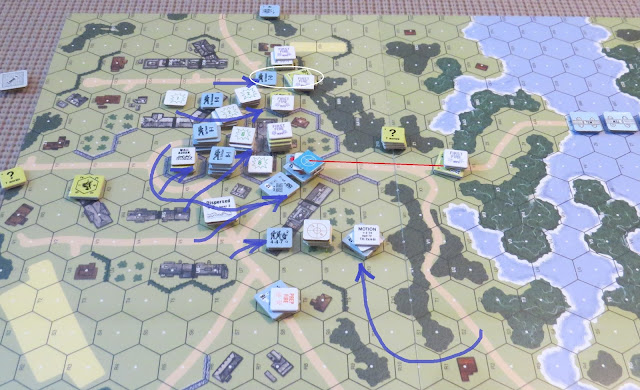
A look at the battle space.
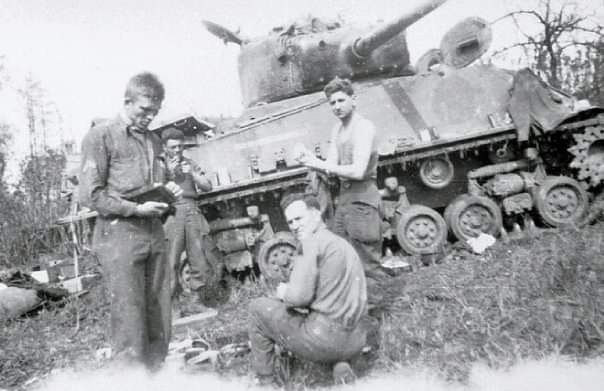
As the American defender, I would command the tankers of the 4th Armor Division and the soldiers of the 53rd Armored Infantry Battalion. I'm a huge fan of the 4th Armor Division

Yep...even my kit shows my affection for the 4th Armor Division. The 4th Armored Division's history began at Fort IBIS in California's Mojave Desert (you may recall last year's Halloween Scenario was set at Fort IBIS). The Division would land at Utah Beach and participate in Operation Cobra. In Lorraine it would defeat to SS Panzer Brigades despite being out numbered. The 4th would be the first of Patton's Divisions to reach Bastogne and end the encirclement of the 101st Airborne. In 1945 the division liberate Ohrdruf and carry on into Czechoslovakia at the war's end. Creighton Abrams would be the Division's most famous member and the legacy of the 4th Armored Division lives on through the Abrams Tank.
My force would consist of 6 x 6-6-6's and a 3-4-6 led by a 9-1 and 8-1 with an MMG, 2 x BAZ44's as well as an M-10 and Sherman tank. My tanks would be subject to ammo shortage. I would roll for reinforcements that could enter from Turn 2 to Turn 7. This force would be made up of 2 x 6-6-6's led by an 8-0 with a BAZ44 and M8 with an 8-1 Armor Leader.


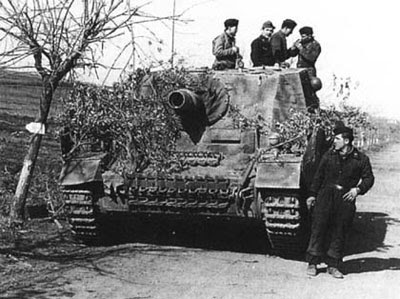
As the German attacker, Dan would command the Panzergrenadiers of the Fusilier-Regiment 312. By SSR Dan's force would enter the board over Turns 1-4 in random groups numbered 1-4. Dan's total force would consist of 7 x 4-6-7's, and 7 x 4-4-7's led by 2 x 8-1's, an 8-0 and 7-0 with an MMG and 2 x LMG's with a 75L Stug, 37L 250 Halftrack, MKIV and a BRUMMBAR!!!! I do love me a Brummbar!
 And now for Dan's Pre-Game Comments:
“The Germans have to push the
Americans from Board 10 (although all buildings are wood). The plan is for the infantry to push through
the village and assault building 10Z6 while the first vehicles that enters will
try to go to board 7 and get a shot at the bridge to try to stop the
reinforcements from crossing. The other
vehicle will help the infantry and try to engage the tanks and knock them
out. The Germans must be careful since
they have an ELR of 2. Leaving them
likely to fade away when breaking. Also,
the American tanks can destroy all the German vehicles in a stand up fight with
the exception of the Brummbar, so the tank battle is difficult. Also, the Germans are limited to a total of
three PF shots. The Germans can also win
by controlling the bridge entry hex at game end. So, if the Americans leave it undefended one
of the vehicles can make a break for the hex to get control. Hopefully the reinforcements can be
interdicted and pressure from the attack allow a vehicle to capture the bridge. Or the village is cleared.”

The German Player has two ways to win the scenario. He can eliminate all good order US forces from Board 10 and/or control Hex 7AA5 at game end. The woods and marsh ensure only one route to the bridge. But even so...I would mess it up from the start and ensure the outcome of the scenario. I positioned by armor to support my infantry rather than keeping German armor away from the bridge. FYI - that is not the right thing to do.

Yep...that would be me...

Dan would roll randomly for each of his 4 groups. Interestingly, they would all come on board in order Group 1 on Turn 1 and so forth. I thought that was kind of funny. Turn 1 was relatively uneventful. A single German half-squad would be broken...but that was it.


Turn 1 - American. I saw an opportunity to take on an isolated 4-6-7. So I sent my Sherman and a 3-4-6 to help out. The 3-4-6 would be broken. And I had now put my Sherman in grave danger. I was very quickly double-downing on bad choices.

Farewell friend...I barely knew you...

Even now as I look back on this move...I so absolutely regret it. I had opened up my left flank and direct route for German armor to the bridge.

It's like I don't know how to play this game....

It's true...sometimes Scotty doesn't know...

Turn 2 - German Group 2 arrives with the Stug..the game winning piece was no on the board.


Dan would move the Stug to threaten my flank as the rest of his force moved to hit me in the center. and Dan's 4-6-7 would fire one of the three Panzerfausts available to him and destroy my Sherman.

I had only begun to pay for my folly...

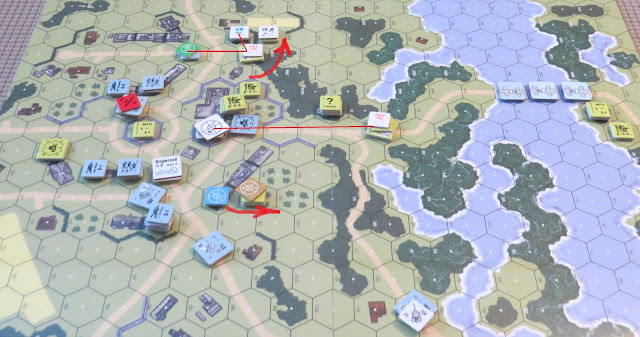
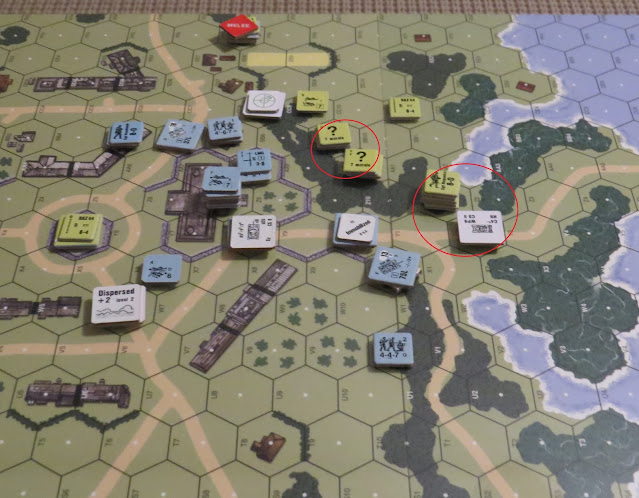
A look at the German penetration after two movement phases.

...but things were about to get real...

Dan would take his first prisoners as my bazooka team surrendered.

Turn 3 - German Group 3 enters the game. The half-track would come on with grenadiers armor assaulting with it.


My reinforcements would also arrive on Turn 3 and not a moment too soon. Dan's Stug was waiting for me...but would miss. It would get another chance...


Turn 4- German Group 4 arrives...all the guests had now arrived. The Brummbar and MKIV were now in the house. My nightmare was complete.

Dan's Turn 4 assault would be his largest to date in the scenario. American firepower would hold the line.
I've never been a fan of US 6 morale...but I do love it when three 6-6-6's open up on an adjacent target.

The German advance was making good progress. My days on Board 10 were fading fast. But "12's" would severely afflict Dan's efforts this night. I counted no less than 5 boxcars which took down the 75L on the MKIV and cost him his MMG...not to mention the casualty reductions and death of an officer. But to his credit...Dan rarely if ever lets that stuff trouble him.

Turn 4 would see my left flank crumble completely, but in the center and right were still intact.
Turn 5 - UGH!!! Dan would swarm the center and move his armor into some new positions. I would hold on, but I was going to have get out of the central building or be trapped there. Both the MKIV and the Brummbar had moved there. I would manage to shock the MKIV and buy my boys some additional time.

Dan's Brummbar would get a critical hit and vaporize one of my 6-6-6's that had gone upstairs.

As things started going south in the village, I would send my infantry across the bridge to hold the victory location. They should have stayed there...but no...I would move them into the action. Oh the litany of bad decisions in this game...


With the close of Turn 5 - I was still holding on.

"Everybody still good...ok...We got this guys!!!"

Turn 6 -- another German tidal wave rolling over me. I had managed to destroy the MKIV, but the Half-track went after my M10, while the Brummbar rolled towards my M8 and the dang Stug went through the woods with way too much ease. I would push back the German grenadiers, but the tanks...oh man...a 75* isn't the ideal weapon....

This Stug...my arch nemesis...

I would go for a deliberate immobilization on the Brummbar and immobilize it. The crew would bail and later be broken. The Brummbar was mission killed.


Dan had finally pushed me out of the village buildings. I was now hiding in the woods.


It's difficult to imagine why my brain was not working during this scenario. I mean...looking back on it now...I'm a freaking lunatic. 7AA5 is the key hex...and what do I do...I move off of it...
In other news, the American Sniper would hit twice in a row on a German half-squad attempting to claim my lost bazooka from Turn 2. The half-squad would be eliminated and we both agreed that the bazooka was cursed.


Dan's Stug would finally get me and some of this was again my own fault. I was going to go for another deliberate immobilization...but at the last second changed my mind. I hit and then rolled a 3...had I gone for deliberate immobilization...the Stug would have been mission killed....but noooo….I went for a kill and failed.
And the Stug...well it didn't mess around. My M8 was a goner...

Turn 6 - the Melee on the right flank would suck troops from both sides into it and would still be raging at game end. I had managed to rally nearly all of my boys and create a HERO which was a serious bout of great luck!!! I almost had an out of body experience with all those successful rolls in a row.

I was almost as happy as when I get to indulge in White Castles during the St. Louis Tournament...
But Dan brought me back down to earth as Turn 7 began. His Stug made a run for the border!!! My 6-6-6 under the M8 wreck failed its PAATC...That's just great!!!...So my Hero held his fire until the Stug hit the Z3 hex...and I would miss...That's just great...


As the Stug went on a tour of the bridge...Dan's Grenadiers came a me with foul intent. The half-track circled around behind me and then the Grenadiers came right at me. I managed to do some damage, but some of Dan's boys survived and would join for me for some friendly Close Combat...to the DEATH....such nice boys....


I would win an ambush on one of the CC's and infiltrate away...so I would maintain one unbroken squad on Board 10...now if could just take down the Stug…

I would send my boys charging down the road and get shot to pieces...my Hero would get within range and then miss in Advancing Fire...game over...Dan's STUG had won the game!!!

Dan was living the STUG LIFE!!!

Don't we all!!!

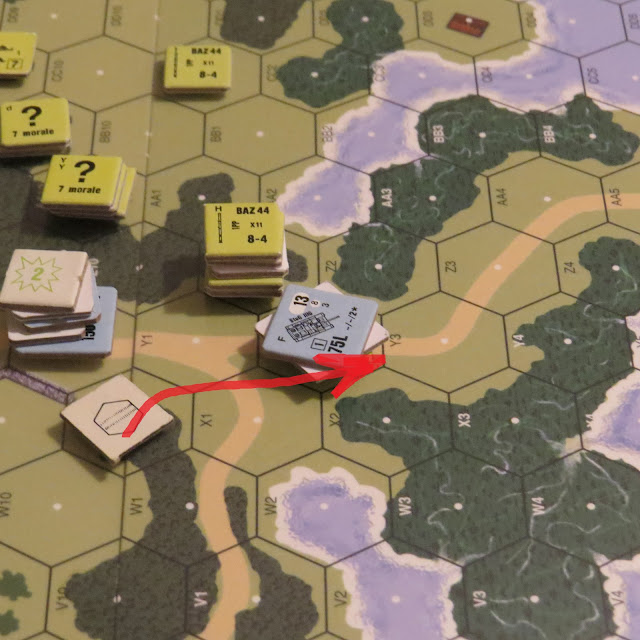
A final look at the bridge fight. 7AA5 was firmly in control of the Germans. The culmination of bad choices by me and great moves by Dan made for a German Victory. Congrats to Dan on a good win and a fun game!

And now for Dan's Post-Game Comments:
“The plan worked. Although the battle in the village was not
successful a vehicle was able to push into the bridge victory hex and defend it
from an infantry attack. The scenario is
a good tournament style battle with the sides very evenly matched. The Germans got a PF to knock out the Sherman
and this gave the Germans advantage in the tank battle. The Americans did knock out two German tanks but
the StuG got to the victory hex and was able to defend it. Which turned out good since the Americans
infantry were able to stay in the village.
My thanks to Grumble Jones for a great game. Good change from the PTO.”

That's a wrap on Morgan's Stand...what a great scenario...highly recommend this one!
Dan and I will be back Friday with a playing of ASL Scenario 42 Point of No Return...and our final scenario left to play in West of Alamein....
That's right...back to the Sahara...

See you then!
Another great AAR - Do you know the changes if any that were made between G30 and ASL 187?
ReplyDelete