For our Saturday game, my opponent, Dan Best, and I selected ASL Scenario Z5 (from the Dagger Pack) Brandenburger Bridge, which was designed by David Lamb. It would be the first time either of us had played this meaty scenario. It has a very interesting story line based on the seizure of a key bridge by the elite German Brandenburgers on the 27th of June, 1941.
The Brandenburgers were Germany's early war year commandos and they had tremendous success in the early years of Blitzkrieg. In this night's game, Dan Best would command the Brandenburgers and have the task of holding both ends of a key bridge. His Brandenburgers would all be fanatic and consist of the following: 5 x 4-6-8's, 2 x 3-3-8's, with 4 foxholes, an MMG, 3 x LMG's, an ATR, a DC and a 50 MTR commanded by two 8-1's and a Hero. Not a big force to protect two sides of a bridge. On Turn 1, they would receive reinforcements consisting of the following: 2 x 5-4-8's, 3 x 4-6-7's led by a 9-2 and 7-0 with 2 x LMG's, an ATR, a Flamethrower, 2 x DC's supported by 3 x MKIII 50's, 2 Half-Tracks and 3 x Trucks. The bad news...they had to enter on a heavily wooded road. The good news...I didn't setup to defend against them.

Dan's Boys would prove to be pretty tough...but the dice would ultimately betray them.
As the Russians, I was tasked with seizing one or both ends of the bridge. I only needed one to keep Dan from winning the scenario. He had to control both Hexes 7I1 and 7I9. Now initially you might think this would be easy for the Russians. Trust me when I say...it was tough...
My forces would set up on both sides of the river to start. I would command the following: 9 x 4-4-7's, 8 x 4-2-6's, lead by a 9-1 and 8-1 with an HMG, MMG, 3 x LMG's, 2 x 50 MTR's, a 45L AT Gun, a 76* ARTY piece and an 82 MTR. I would also receive two reinforcement groups: On Turn 2 I would get 3 x 4-4-7's led by a 7-0 with an ATR and a Tank. On Turn 4 I would get 3 x Tanks, a Flak-Wagon with 2 x 6-2-8's, 3 x 4-5-8's, and 2 x 4-4-7's led by an 8-0 with an LMG and DC.
I would make a huge mistake (SO LEARN FROM ME MY YOUNG PADAWAN). On the west side of the bridge, I placed my forces to put pressure on the bridge. The AT Gun was positioned to receive the German reinforcements coming up the wooded road. I should have placed everything there. You will see why as this AAR unfolds.
Dan's reinforcements came on through the woods as his bridge units prepped the targets they could see.
My AT Gun lit up the first Half-Track that came down the road. It would be the only success for my AT Gun. Dan's effort was designed to put a defensive front to prevent my Turn 2 reinforcements from entering the game. I had not fully understood that my reinforcements had to enter the board on Hex 32R6. Dan would be waiting for me (think Omaha Beach) and would devastate me.

One of my least positive qualities while playing ASL is that I often skim the scenario card rather than really reading through it and understanding all the in's and out's. To his credit, Dan understood very well the importance of interdicting the entry point for my reinforcements. A tank and three squads could very quickly imperil the west board edge. My failure to plan ahead would doom my reinforcements.
Back on the east side, things had become a bit of a slugfest as I traded shots with Dan's boys. I managed a lucky break when one of his Brandeburger 4-6-8's went down and out after rolling the first of many 12's. So I swarmed some 4-2-6's at the German 8-1. That dude took over the LMG and proceeded to mow down 1-1/2 squads. Dude was a regular Hugo Stiglitz!!!

As my boys pressed on the east end of the bridge, so too did my forces on the west side. However, I would not enjoy the same success on the west side as I would on the east. Dan's forces would throw me back nearly every time.
Things moved quickly on the east end of the bridge and I was making good progress towards the J9 Hex.
Dan's infantry quickly took my AT Gun and the crew self-routed back and then rallied with a Snakes! They would be a distraction, but nothing more.

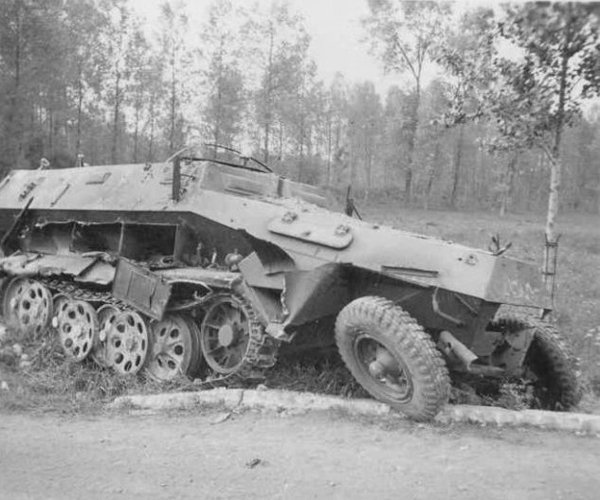
In Turn 2, Dan's remaining Half-Track sped across the bridge and tried to help hold the fort. My ATR managed to immobilize it and Dan's boys bailed out and into the fox hole with the 3-3-8 already there.

Every now and then the ATR's get it done!
Turn 2 went well for Dan on the west side. His infantry had moved into position and he had his defensive position ready to receive my incoming reinforcements.
Not bad for only having two movement phases to accomplish it.

Dan sent two MKIII's to the bridge.

My AT Gun crew would finally fall in a lopsided Close Combat.
As the battle raged...I began dialing in my OBA (70mm) to hit the west end of the bridge.
At the end of Turn 2...Dan's line was ready to welcome me.
Situational overview at the start of Turn 2. Dan had control of the west end...but the east end was in danger of falling to my Russians.
My Turn 2 Reinforcements came on to a German welcoming committee who promptly shot them all down and destroyed my tank. I accept responsibility for not having protected their single point of entry. That was a total defensive bungle on my part. BUT...having to enter through that single point struck me as odd. I would have liked to have had at least one more hex back to come in, rather than simply enter right in the sights of my opponent.
Ok...yes it seemed dumb to me...but of course not as dumb as my failure to protect my entry hex!
Despite my lack of good fortune in the west, I was successful in the east and had control of the J9 hex.
Oh...but what is that sound...oh no...STUKAS!!!...I hate Stukas....
and there were two of them...
One of the interesting aspects of the fight for the west end of the bridge is that while my reinforcement group was being wiped out...they were also distracting Dan from my forces operating near the bridge. So this allowed me some breathing room to rally some boys and remain a thorn in the side. Now my OBA also contributed as Dan didn't want to send troops into the incoming rounds and those incoming rounds would continue until the remainder of the game. My 70mm OBA didn't do much actual damage, but the threat of trying to move through it made it very valuable.
Back at the east end of the bridge, my Russians had secured control.
My Boys occupied the J9 foxhole and made themselves at home!
Dan remained very aggressive with his infantry and sent a Brandenburger 4-6-8 into CC with a 4-2-6. My 4-2-6 would end up reducing the Brandenburgers and forcing melee.

In my Prep Fire, my 76* Arty went back to work. He had taken out one of the Panzer III's, but despite multiple hits on the other one, could not destroy it.
My 82 Mortar joined the action and managed to immobilize the Panzer MKIII.
Then those dang Stukas swooped down...but both would fail their sighting task checks. Dan's dice roll woes just continued to pile up.
BAD DICE!
But, the Stukas remained a threat...
My sniper was very active and ultimately ended up eliminating the German Sniper.
Good job Nadia!!
At this stage of the game, Dan's Germans were facing some tough realities. Dan had control of the west end, but the constant OBA was preventing him from sending troops to take back the other side. He would have to commit his last mobile MKIII.
It came rolling across the bridge and my boys were powerless to stop it. It parked on the elevated road to await my Turn 4 reinforcements.
My Turn 4 reinforcements came on to a welcoming dive of Stukas!!! The first one came in hard and dropped his bomb...Dan rolls the dice...it's a "12"...oh good grief...Dan was in the double digits for boxcars and this one was just absolutely demoralizing.
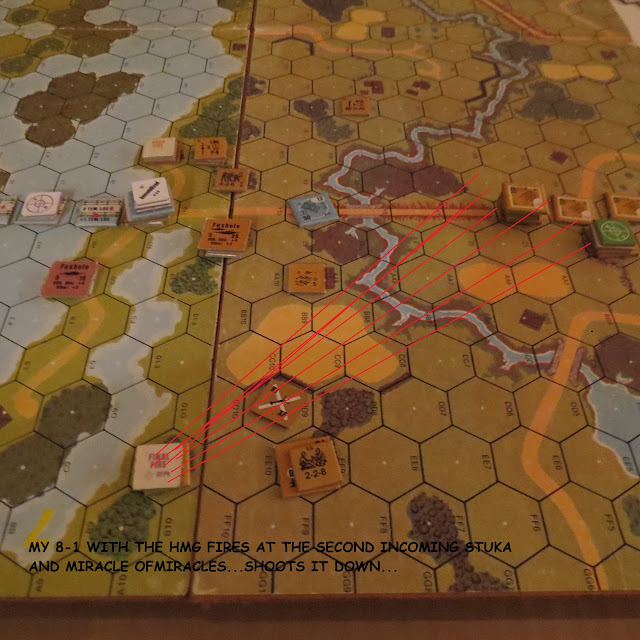
The second Stuka came in on a different approach path and my leader manned HMG sent tracers at it. I rolled and shot down the second Stuka....unbelievable luck for me and horrible luck for Dan.
And at the late hour of the evening, this final event would begin thoughts of concession.
My reinforcements plunged ahead and Dan's MKIII managed to immobilize the lead tank, but with the amount of Russians coming at him and the continued OBA pounding on the west end of the bridge...Dan decided that enough was enough and gave the concession. The Russians had the win.
A final view of the battle. Dan's Brandenburgers had not lived up to their name and suffered harshly from high morale check rolls and enough 12's to choke a horse. My Russians benefitted more from German bad luck than from any kind of sound offensive strategy.
My thanks as always to my Saturday opponent. Dan never wavered in his efforts despite how much his dice worked against him.
Dan and I both agree that this is really fun, interesting and challenging scenario that has a lot of cool stuff going on. It also requires a lot of thought. So take your time and don't be impatient like Grumble Jones.
Dan and I will be taking another break from our Saturday gaming as I am moving my family from Tulsa next week and Dan will be attending the great ASL TEXAS TEAM TOURNAMENT. So if you are in Texas don't miss the opportunity to play a game against Dan Best. You will have an awesome time!
See you again in two weeks.


Best board game AAR ever!
ReplyDelete