
Our Friday game consisted of Turns 1 and 2 of ASL Scenario OA21 Gunter Strikes Back. My STL opponent and I have been focusing on some quick play scenarios and this one, at 4-1/2 turns really fit the bill.
I drew the Germans and my STL opponent drew the Brits and would have the honor of defending and trying to keep the Germans from controlling the 14H9 Building. Naturally, this scenario felt very similar to the one we had just played, but there are some interesting aspects of this scenario that helped give it a really different flavor.
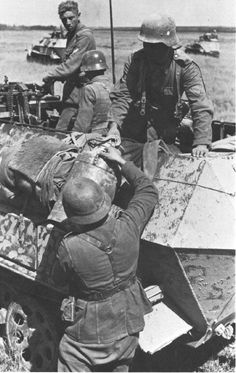
The Germans are are attacking across an airfield littered with wrecks. In our case, 4 of these were burning. So as an attacker, I was happy to see the addition of cover across the open airfield. My opponent...not so much.

Now a quick note about this post's pictures. The Grumble Jones staff photographers are generally always prepared and right in the thick of the action...well...I experienced double battery failure on my Canon SX 50 HS. I had forgotten to charge them. So just as the action got good at the end of Turn 2...my camera went dead. So the last 4 pics were taken with my Iphone...discerning readers will certainly notice the difference...so there's the explanation.

Rules note -- my opponent and I placed smoke on the 4 burning aircraft (but in hindsight, we may have been incorrect to do so without a mild breeze having already been rolled in wind change). So our bad...

It just felt right to us as we set up the scenario.

I elected to mass my infantry towards the east edge of the runway (also furthest from the victory location...typical Grumble Jones move). The 8-1 had 3 x 4-6-7's and the mortar and my 9-1 had 2 x 5-4-8's and both LMG's.

My 9-1 did register his complaints about only getting 6 squads...but the commanding General pointed out..."Make do and use your armor assets wisely...any other questions?' "Nein...zum befehl."
My reasons for concentrating my squads was to maximize my fire power against what I predicted would be single or half-squads up front.

On the west edge of the airfield I sent my half-tracks, armored car and Marder III.

I love German half-tracks...just one of my favorite vehicles to deploy in ASL.

My STL opponent is great at fooling me and I was shocked to run into the Piat (his only one) right up front. I figured, the forward edge of the airfield would be mostly dummy stacks and maybe a half-squad or so. Nope...I ran smack into a 4-5-7 with the Piat.

The Piat fired...and rolled a "10". A miss and a Malf. First shot...first roll of the game. My opponent sighed long and hard on the other end of the SKYPE connection. "I know dude...that sucks." Of course my boys were very happy at being missed and would quickly dismount and make ready to assault the now unconcealed 4-5-7.

My moves on the east edge went according to plan...almost better than I could have hoped. On the west edge, my armor drew fire from the British mortar in the foxhole at F8. The mortar missed and my grenadiers would dismount adjacent to the mortar and 2-4-8.

The mortar certainly worried me as my Marder III and Half-track were vulnerable targets.

At the end of Turn 1 movement phase, my forces had all successfully moved to their designated spots. I was placing the Marder III so it could have a full field of fire down the runway and prevent the Sherman from crossing it.

At the east edge, my armored car and half-track were assisting in taking out the British 4-5-7 in the area.


Heading into the British phase of Turn 1, my opponent would go for the repair dr on his Piat. A "6"...no more Piat. I had really dodged a bullet....


As expected the Sherman tank rushed forward to engage my armored car and half-track. I had actually feared that he would overrun my 8-1 with the 2 x 4-6-7's in P5. With no Panzerfausts in the game by SSR...he could have really hurt me.

Instead the Sherman went after armored targets.

At the conclusion of Turn 1, the Sherman and the armored car had traded acquisitions.

I knew I was fooling myself to think my 20L was going to take out the Sherman...but I fired anyway.

Turn 2, my forces moved up after eliminating the British 4-5-7. It broke in my D-Fire and failed to rout.
My 9-1 and one 5-4-8 moved to the half-track. They will mount up in Turn 3 and head to the objective.

My infantry continued their moves without receiving any fire from the British. I had been very successful in moving around the east flank. Either I was facing dummys or my opponent had nerves of steel and was patiently waiting for just the right shot.

The Sherman did succeed in knocking out my armored car. Not a big surprise there.

At the conclusion of the German phase of Turn 2, I was pretty happy with things. At the west edge of the airfield, the British 2-4-8 had been eliminated for failure to rout and my Marder III was sitting at the end of the runway....waiting...waiting...


Turn 2 British phase opened with my opponent moving the Sherman across the runway to go after my half-track K4. I fired first with my mortar and did nothing...and very nearly forgot to fire my Marder III. But thankfully...didn't completely forget.

Hit from the side, the Sherman never had a chance against the 75L.

The crew of the Sherman successfully bailed, but would break under the weight of German MG fire.


With the Sherman destroyed, the air came out of my opponent's sails. We wrapped up Turn 2 and called it a night. Despite some setbacks, my opponent's British are still in good position with 4 squads and a 9-1 holding the victory location. My Germans only have 3 more movement turns to get the job done. So we shall see what Turns 3-4-1/2 bring.

No comments:
Post a Comment