
And so at long last the final CG turn of the epic struggle for Pegasus Bridge has begun. February seems so far away now and the battles fought in the early turns seem light years removed from the current struggle. As the sun begins to set, the 192nd Panzer Grenadiers prepare once more to grapple with the Ox and Bucks and their Allied horde streaming in from Sword Beach.
The AAR for Turn One will have a few extra battle pics to give the reader a clear idea of the relative German and British available forces and their positions.

It's game time!
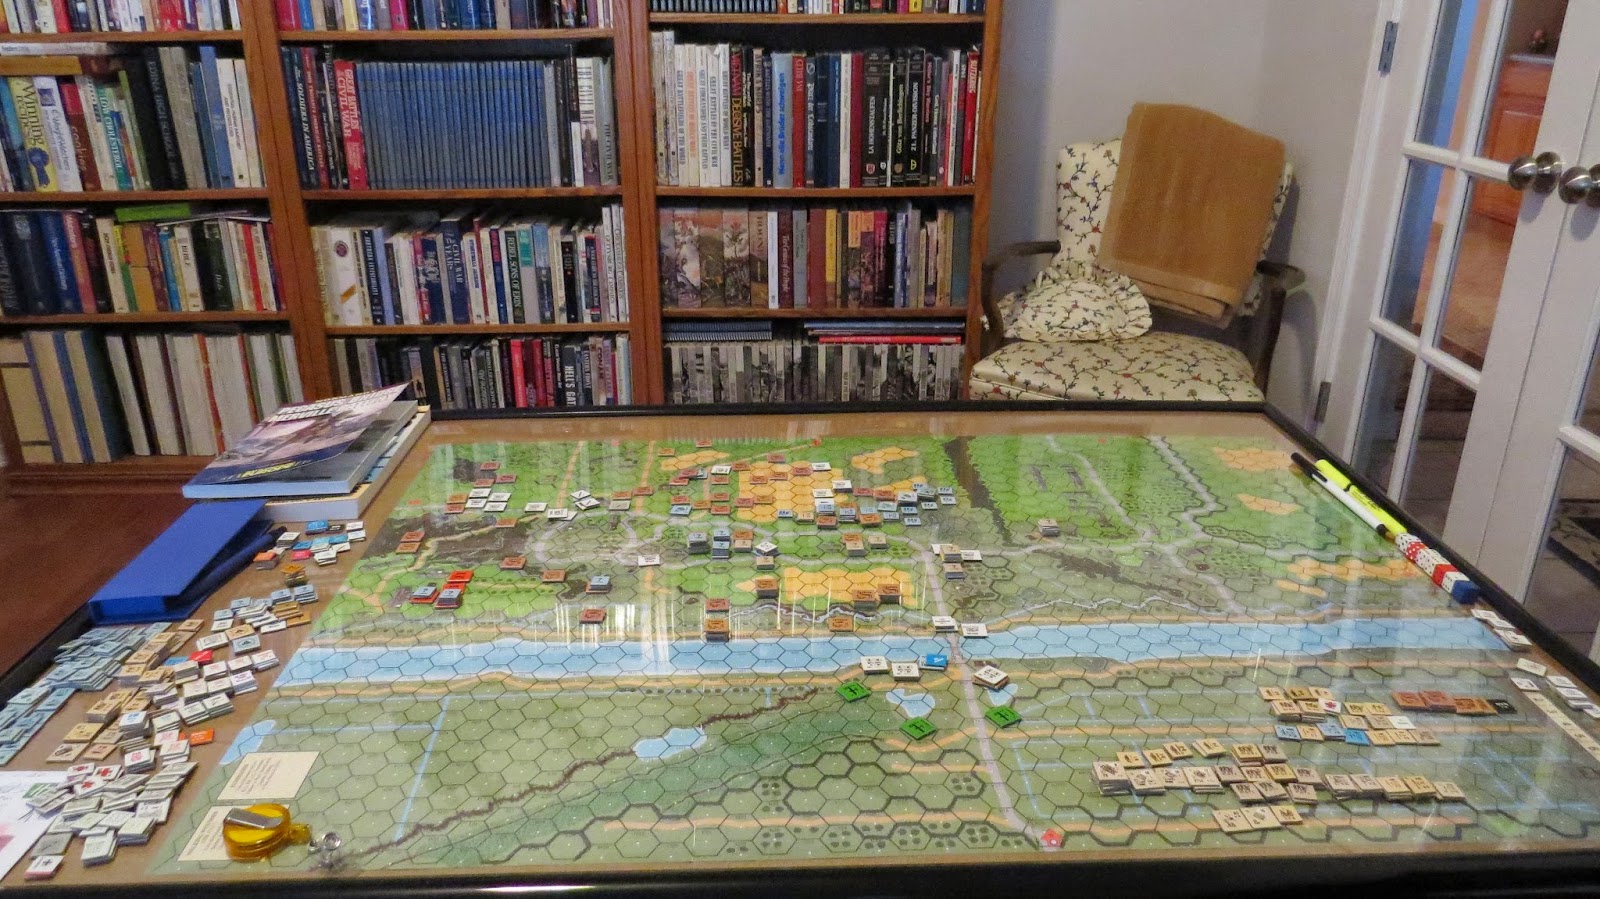
The scene of many months of ASL glory!

The British forces laid out and made ready to unleash holy ruin on my German Landsers.

It would be a shame to waste good Churchill VII Tanks...eh wot?

Major Howard's remaining forces after 7 complete CG Turns. Too many captured German machine guns to be sure!

Major Howard has held the objectives since the end of Night III...but since Day 1, his perimeter has shrunk with the relentless German attacks.

British dispositions at the T-Intersection with some boys in Le Port for good measure.

The Town Hall and School House Sector are also well defended at the start.

My opponent kept an in my face defense in Northern Benouville. The object of their desire...my immobilized MKIV...they would get one chance before my German Landsers would be all over them!

One of the most difficult parts for the British Player in this CG is having to cover all possible lanes of attack. Thus the strong British presence along the Canal. They are making sure the Germans don't make an unexpected run on the Bridge along the canal.

I set up strong in Northern Benouville. I will admit that of all my objectives, clearing the British out of Benouville was very high on my list. Of course I can't win the game by controlling Benouville, but it's still important to me nonetheless.

My 9-1 Panzer Leader is commanding my T-Intersection Kampfgruppe. But he has a German 8-0 leading the Grenadiers...and he's an awesome 8-0!!!

That's right Chuck! **(this is before he joined Aldo the Apache...)

In the early phases of this game, my opponent and I both wondered what use the Chateau would ever be in this battle. And wow...has it been a key element of the German effort. It has given the Germans a great overall view of the battlefield and of course the machine gun position there is one of the best in the entire game.

Not surprisingly, my primary concentration of German forces is ready to launch itself at the T-Intersection. It's do or die now... This position is certainly vulnerable, but the fire groups created here are fairly epic!!

Oh yeah...my boys are ready to go!

The first reinforcements from Sword Beach show up on the east edge.

The major British force sets up to arrive from the North. This is one massive force...

The British make their first push towards the bridge. There is no German response as they CX into position.

Another group consisting of Stuarts and Carriers supported by 4-5-7's with PIATs swung through Le Port and made for the treeline to the south. The end around attack is assembling...

The primary British reinforcements enter on the North edge and travel through Le Port and along the canal road.

One very impressive force. The large number of infantry and 5 Churchills should make things very hot for my Landsers.

Howard's boys on the 1st Floor at the T-Intersection lay down heavy fire...but they roll Boxcars...breaking their captured German MMG.

Turn 1was interesting for the number of Snake Eyes and Boxcars that were rolled. At least 3 of each were rolled. One of the worst for the British came on the 1st Prep Fire of the game as the PIAT Team in Northern Benouville took their shot at the immobilized German MKIV. It looked to be pretty much an auto kill...but after achieving a hull hit...the effect dice roll came up "12". So a dud PIAT shell bounced off the MKIV. The PIAT Team would not get a second shot. An incredibly lucky moment for the Germans.

Yes I do...

My opponent really surprised me with his eye for long shots. His Churchills set up perfectly to fire on my 3 MKIV's. I really had not anticipated that move and it was brilliant on his part. Thankfully, I didn't suffer any damage, just a plethora of acquisitions. Naturally in my Prep Fire, I smoked the daylights out of the area.
My opponent rolled a number of snake eyes and my sniper was activated twice with a one that resulted in DM'ing two 4-5-7 rider squads along the canal road. It also served to cause the British tanks across the battlefield to button up. This is a key moment in the battle as the Churchills only have 8 MF and being buttoned up could slow them down tremendously.

My German sniper in the north was spot on!

Now my sniper was not quite a Fredrich Zoller...but he also isn't a member of the Gross Deutschland serving on the Italian Front...just say'n....

The British armor on the East side of the Canal fire at Germans on the Chateau roof top. Meanwhile, a German 5cm Mortar goes on a ROF tear with 7 straight shots including a snake eyes and then naturally a BOXCARS to break the mortar. I knew I shouldn't rolled that final ROF to hit...cause you just knew it would MALF!!!

And Stonewall Jackson...I am surely not!!!

I had hoped to beat the British to the tree line...but the Ox and Bucks put two 6-4-8's with captured German LMG's there first.

The British were hit hard in the School House and Town Hall sector, which forced a rout towards the row of houses near the T-Intersection.

My MKIV's again made their presence felt.

My Germans moved into some key buildings in North Benouville and made the first move towards the Town Hall and School House sector.

The elimination box at the end of Turn 1.

Turn One down...6 or 7 more to go before we roll out and determine a victor because
THERE CAN BE ONLY ONE!!!!
Interesting first turn there
ReplyDeleteIan